Inworld Runtime lets you iterate on prompts, models, and other LLM and TTS configs without redeploying code. This guide walks through the entire workflow—from CLI prep to Portal configuration.
Summary
- Code your agent – Code your agent, enable remote config, and deploy via CLI.
- Register variants – Use
inworld graph variant register to register the graph for experiment. Or upload the JSON via UI.
- Start experiment – Set targeting + rollout percentages in the Experiments Tab in Portal
- Monitor & roll out – Monitor metrics dashboards, then promote the winner.
Experiment workflow
Step 1 – Code your agent
Install the CLI:
npm install -g @inworld/cli
inworld init --template llm-to-tts-node --name my-agent
cd my-agent
const graph = new GraphBuilder({
  id: 'my-graph-id',
  apiKey: process.env.INWORLD_API_KEY,
  enableRemoteConfig: true, // Required for Experiments
})
  .addNode(llmNode)
  .setStartNode(llmNode)
  .setEndNode(llmNode)
  .build();

const userContext = new UserContext({ // Add user context
  tier: user.tier,
  country: user.country,
  app_version: '2.1.0',
}, user.id); // targeting key
inworld run ./graph.ts '{"input":{"message":"Hello"},"userContext":{"targetingKey":"user123","attributes":{"tier":"premium","country":"US"}}}'
import { telemetry, MetricType } from '@inworld/runtime';

telemetry.init({
  apiKey: process.env.INWORLD_API_KEY,
  appName: 'cli-ops',
  appVersion: '1.0.0',
});

telemetry.configureMetric({
  metricType: MetricType.COUNTER_UINT,
  name: 'successful_interactions',
  description: 'Count of responses that reached business success criteria',
});
Step 2 – Register variants
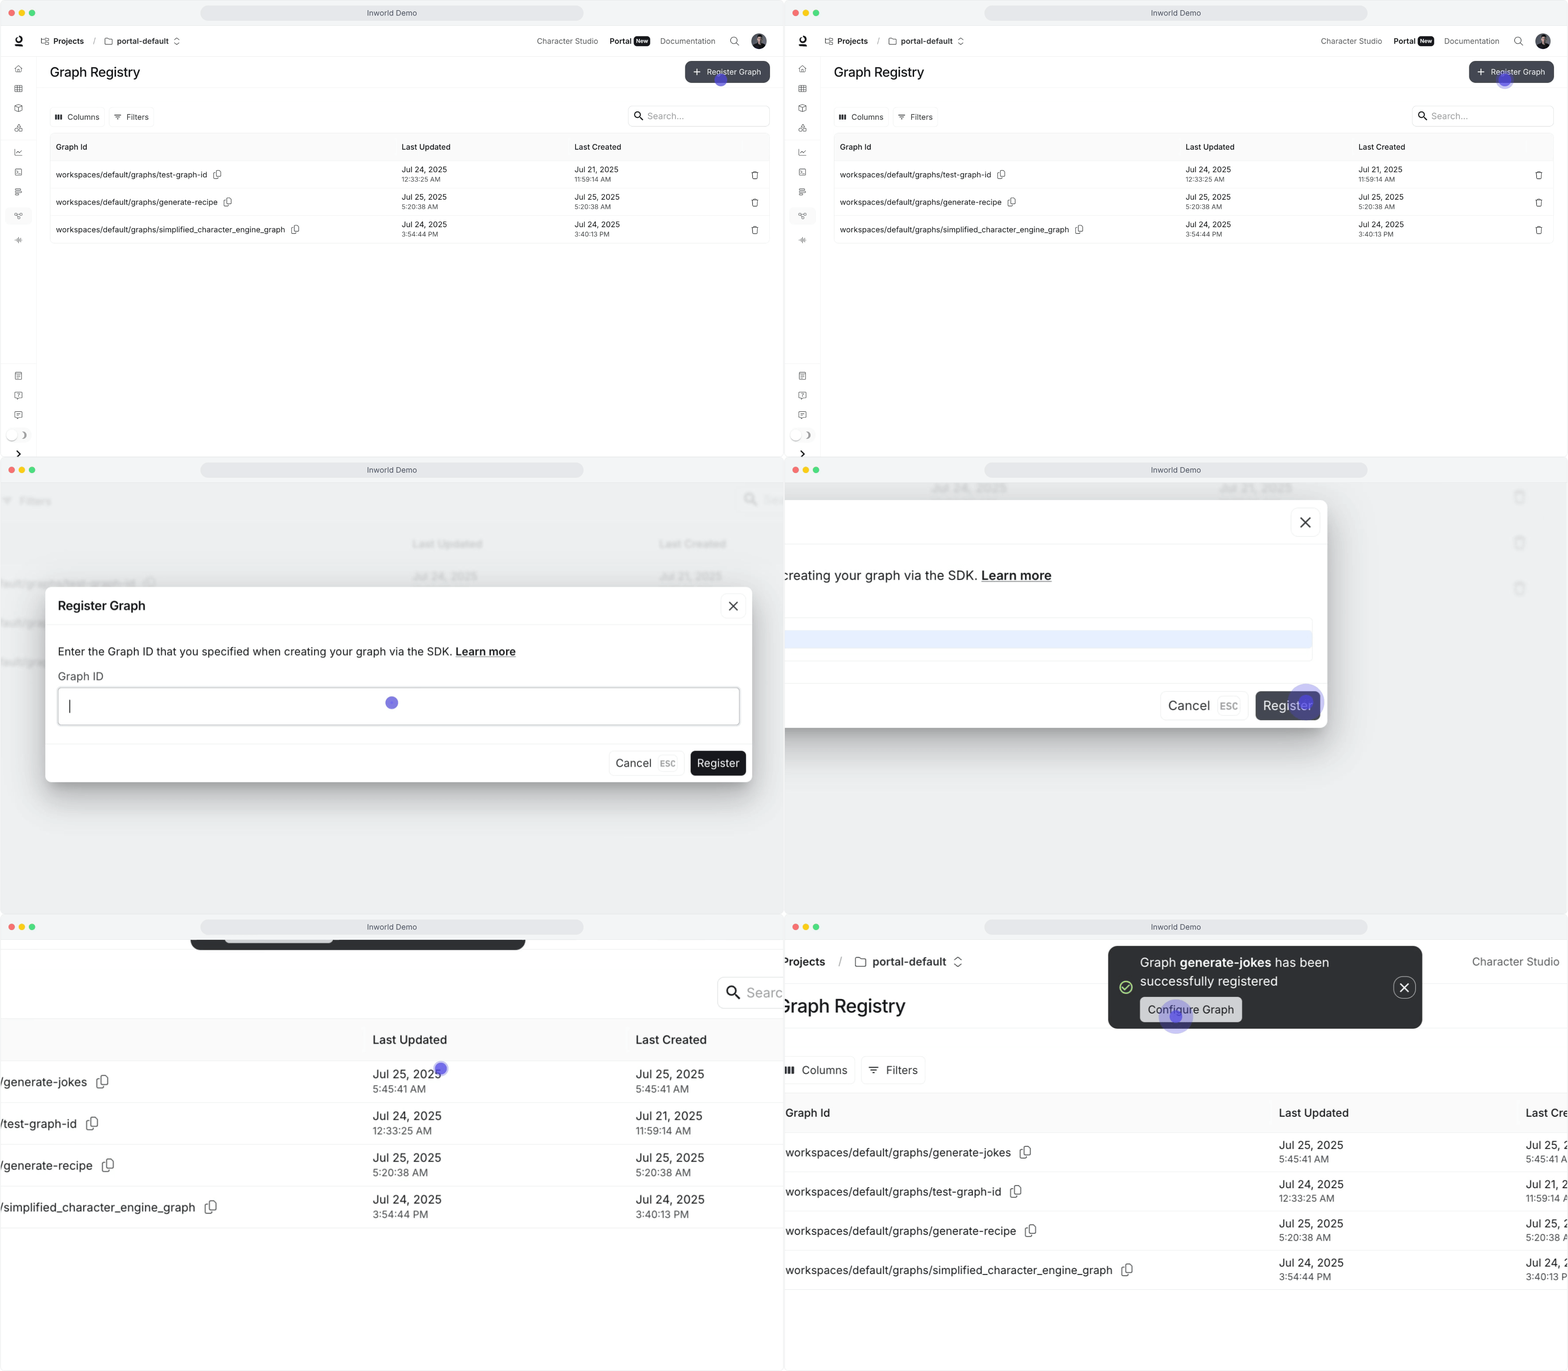
Registering a variant means telling Portal which configuration should be available in Experiments. Start with the baseline version, then add additional variants.
Register the baseline variant
Choose the registration workflow that matches your deployment:
- Hosted endpoint (recommended): Deploying with the CLI automatically registers the graph ID and baseline variant:
inworld deploy ./graph.ts
- Self-host + CLI: After building your graph, push the baseline configuration manually:
inworld graph variant register -d baseline ./graph.ts
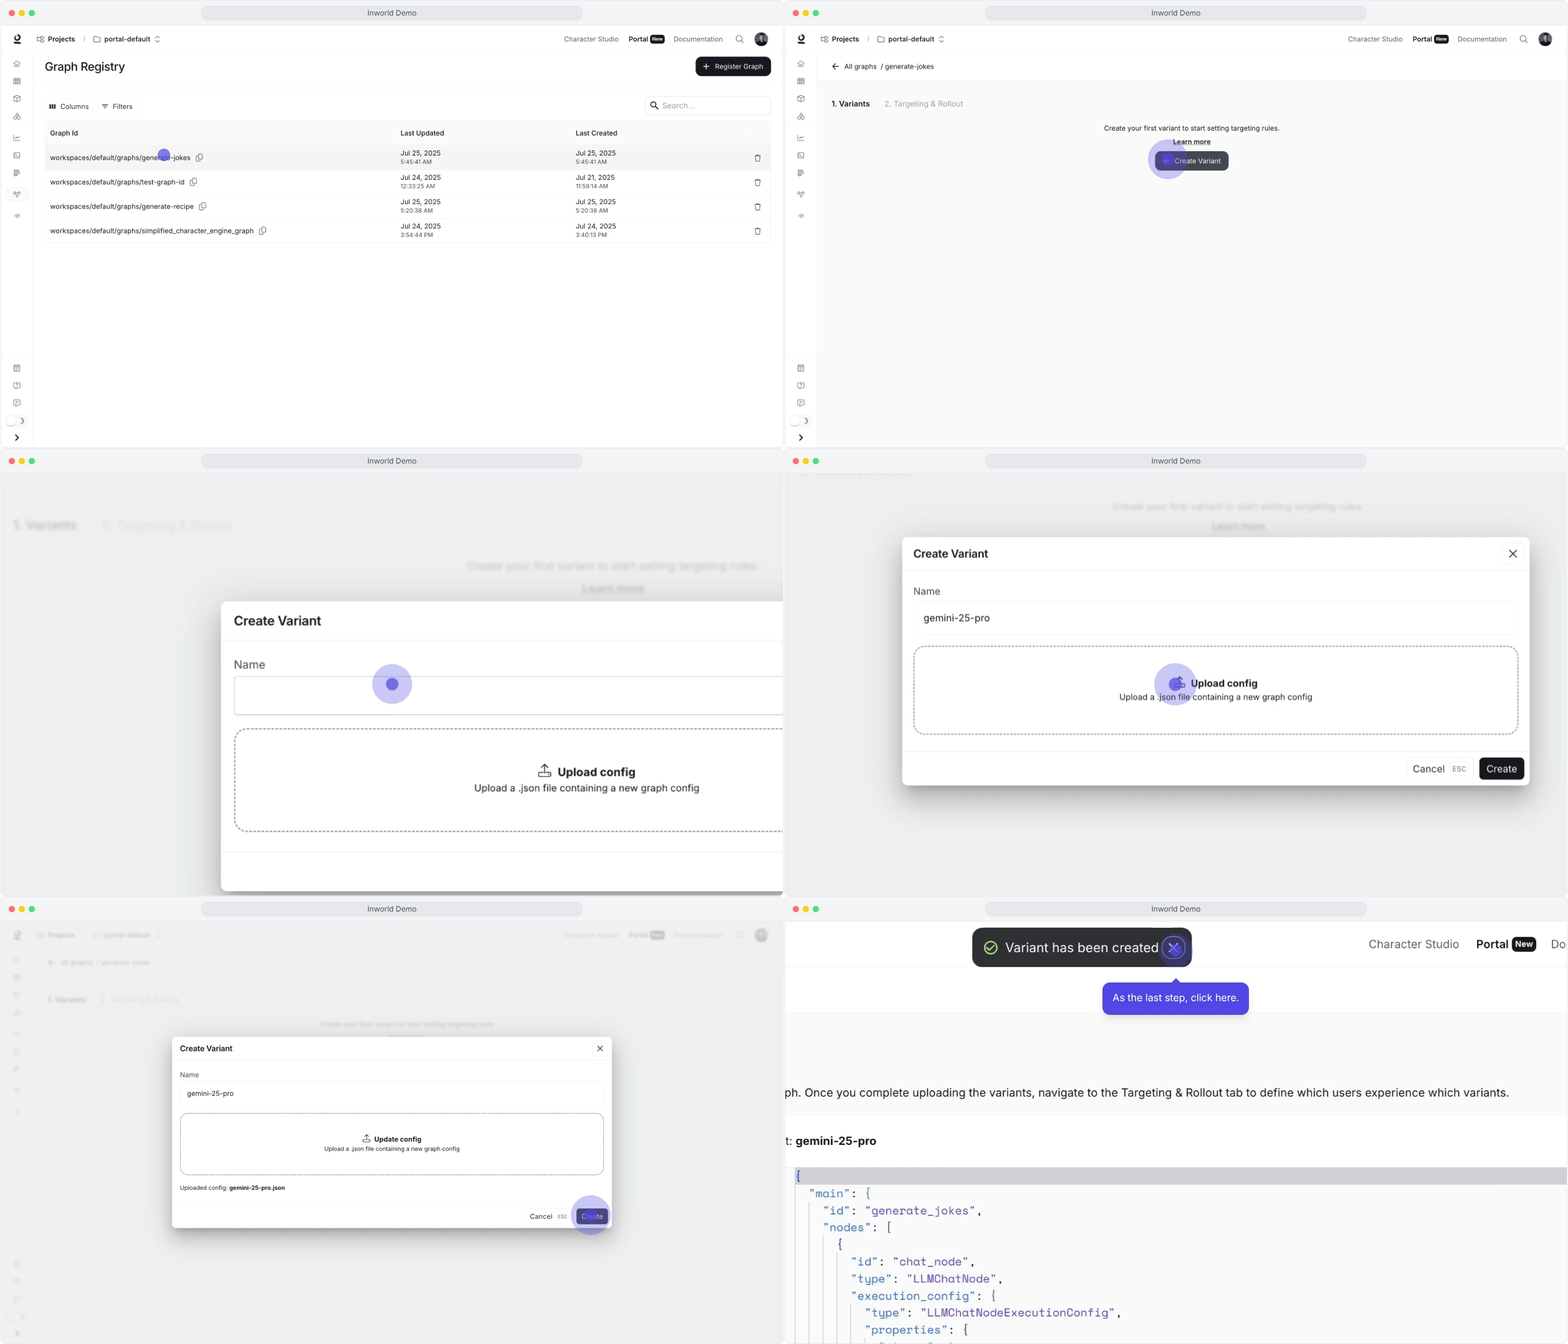
- Self-host + UI: Export the graph JSON and upload it in Portal:
inworld graph variant print ./graph.ts > baseline.json
- Open Register Graph and enter the graph ID exactly as defined in your code.\

- Click Create Variant, name it, and upload
baseline.json.\

Add additional variants
Create an experimental copy and change the LLM provider (or any other settings):
cp graph.ts graph-claude.ts
const llmNode = new RemoteLLMChatNode({
  provider: 'openai',
  modelName: 'gpt-5-mini',
  stream: true,
  textGenerationConfig: { maxNewTokens: 200 },
});
const llmNode = new RemoteLLMChatNode({
  provider: 'anthropic',
  modelName: 'claude-4-sonnet',
  stream: true,
  textGenerationConfig: { maxNewTokens: 200 },
});
inworld graph variant register -d claude ./graph-claude.ts
inworld graph variant list ./graph.ts
Step 3 – Start an experiment
Set targeting rules
Open the Targeting & Rollout tab → + Rule and configure the following:
- Add filters on user attributes (
user_tier, location, etc.) and assign percentages that sum to 100%.
- Save the rule and repeat for additional cohorts (keep specific rules at the top; use “Everyone else” as the fallback).
Order matters—rules are evaluated top to bottom.
Traffic allocation only works if requests include a targeting key and attributes (built in Step 1).
- Use the rule menu → Enable, then click Save to go live.
- Start with small allocations (10–20%) to validate; increase once metrics look good.
- Use the same rule menu to disable, delete, duplicate, or drag-to-reorder rules.
Step 4 – Monitor & roll out
Monitor your experiment results and deploy the winner:
- Watch metrics, dashboards, traces, and logs while the experiment runs.
- Increase the winning variant’s allocation gradually (50/50 → 70/30 → 90/10), then set it to 100% and retire old rules.
- Roll back or tweak allocations if latency, errors, or business KPIs regress.
How Experiments picks variants
When a request hits your graph, the runtime decides whether to use the local configuration or a remote variant from Experiments:
- Remote config must be enabled.
- The graph ID must be registered in Experiments and have at least one active rule that returns a variant.
If remote config is enabled, Experiments evaluates each request as follows:
- Local cache check: If the compiled variant for this user is cached, it executes immediately; otherwise Experiments is queried.
- Variant fetch: Experiments evaluates your targeting rules, returns the selected variant, and falls back to the local configuration if no rule applies or the fetch fails.
- Compile & cache: The runtime compiles the variant payload, caches it, and executes the graph with the new configuration.
Troubleshooting
Why are all my users getting the same variant despite setting traffic splits?
This happens when the UserContext is not properly configured in your code. Here’s what you need to check:
-
Specify a targeting key: This is typically the user ID and ensures the same user gets consistent variants.
// CORRECT: Each user gets a consistent variant
const userContext = new UserContext(
    {
        country: country  // attributes for targeting rules
    },
    userId  // targeting key
);
await graphExecutor.execute(input, executionId, userContext);
// INCORRECT: All users get the same variant
await graphExecutor.execute(input, executionId);
-
Include targeting attributes: Make sure to pass any attributes that your targeting rules use (e.g., country, user_tier, etc.).
If you don’t specify a targeting key, all users will share the same default key, causing everyone to get the same variant regardless of your traffic split settings.
enableRemoteConfig: true is set in your CLI project (Step 1) and inspect your application logs for Experiments fetch messages. If remote config is disabled, the runtime always executes the local configuration.
How do I know if Experiments are working?
- Ensure remote config is enabled and the graph ID is registered in Experiments.
- Verify that the relevant targeting rules are enabled and percentages sum to 100%.
- Pass different user attributes to confirm that variant assignments change as expected.
- Monitor logs/dashboards for variant metadata or assignment info.
Why is my graph always using the local configuration?
Check these common causes:
- Missing
INWORLD_API_KEY so the graph never authenticates.
enableRemoteConfig is set to false.- Graph not registered in Experiments.
- No active targeting rules or no variants configured for the matched cohort.
What changes can I upload without redeploying code?
Supported via Experiments:
- Switch LLM/STT/TTS models or providers.
- Adjust node configuration (temperature, token limits, prompts).
- Reorder/add/remove built-in nodes while preserving the same inputs/outputs.
- Update processing logic (edge conditions, preprocessing steps, data flow).
Requires a code deployment:
- Adding new component types.
- Introducing unregistered custom nodes.
- Changing the graph’s input/output interface.
- Using custom edge conditions beyond supported CEL expressions.
See UserContext for additional targeting guidance. 
