Documentation Index
Fetch the complete documentation index at: https://dev.docs.inworld.ai/llms.txt
Use this file to discover all available pages before exploring further.
Overview
The Inworld’s Unreal Runtime lets you iterate on prompts, models, custom nodes/edges parameters, and configs (LLM and TTS) without redeploying code. This guide covers the full workflow: graph creation, Portal setup, and experiment rollout.Experiments workflow summary
Step 1 - Create a Graph asset
1. Code your solution
In this example we developed a simple Blueprint that instantiates the graph, runs it, and prints the response on screen.2. Design your graph
The sample graph makes an LLM call: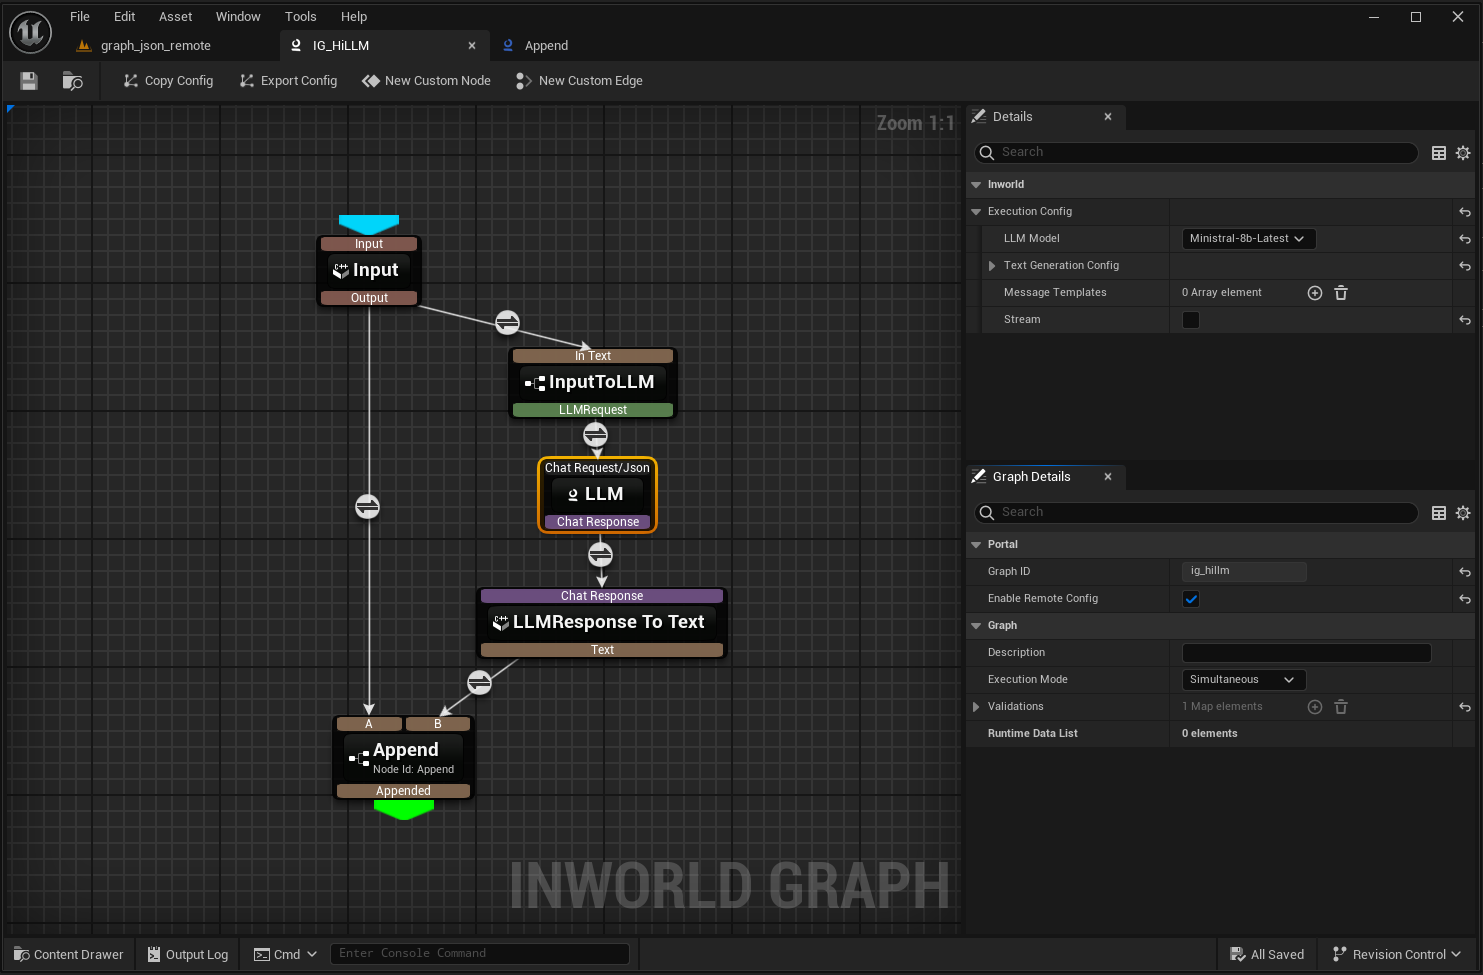
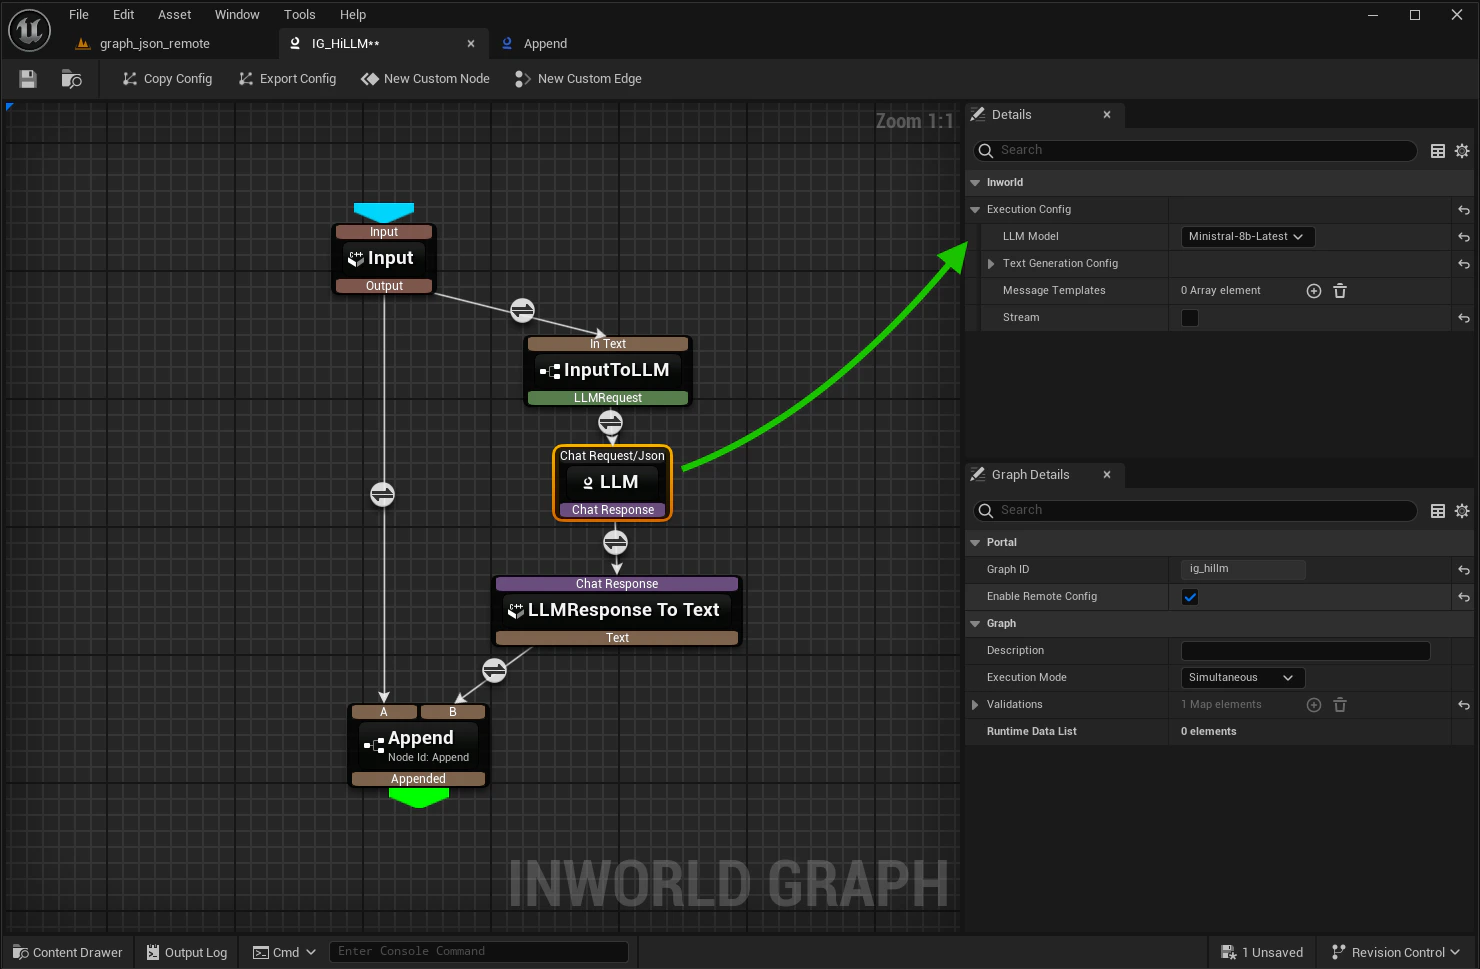
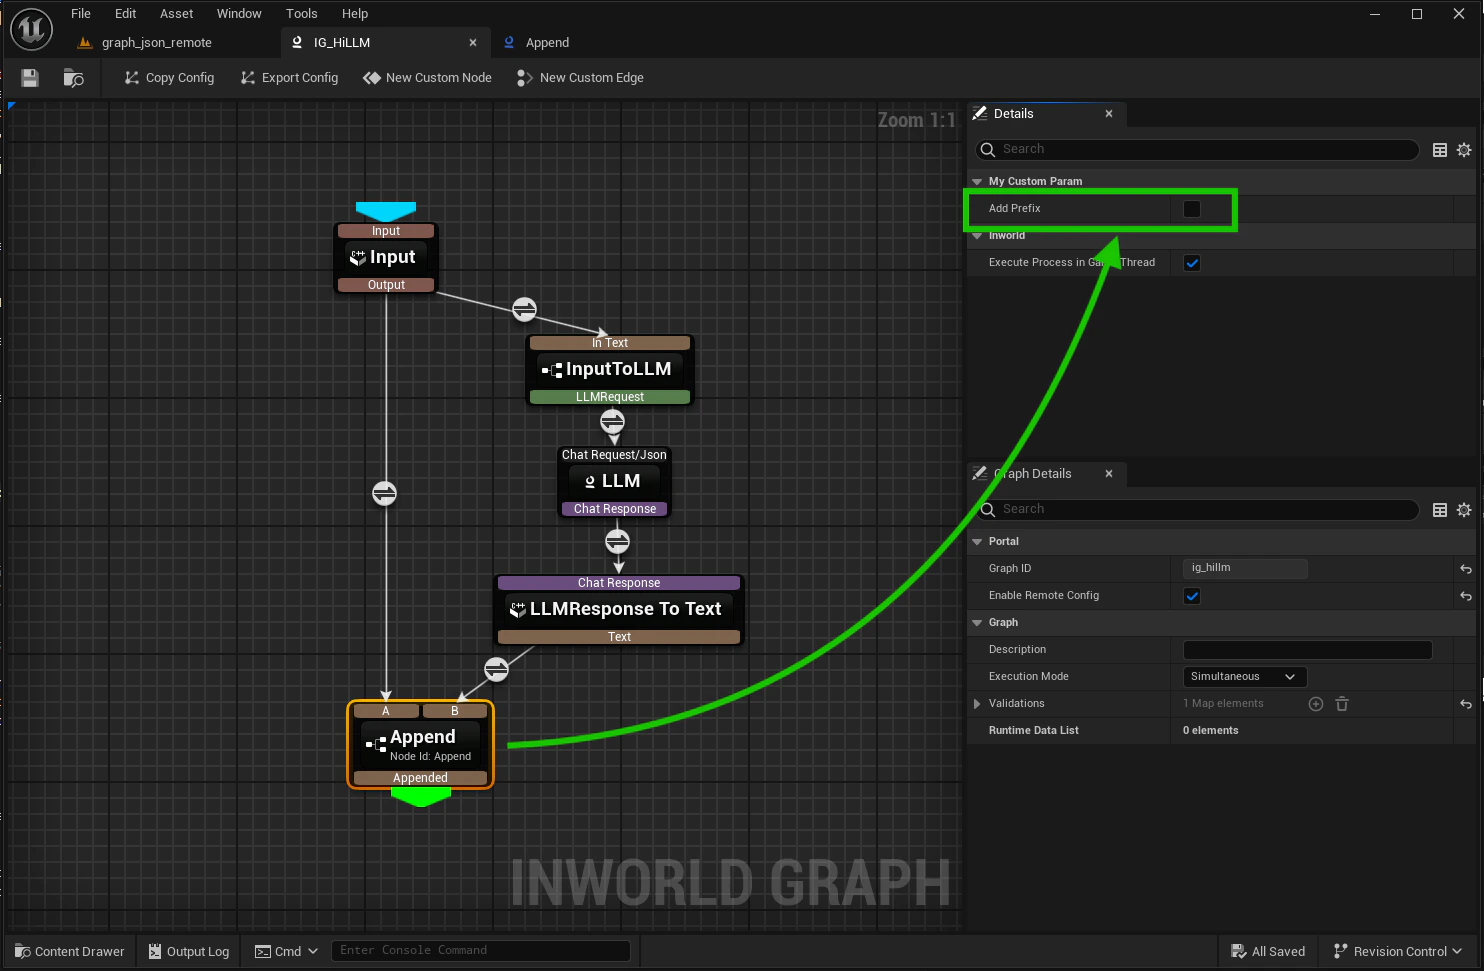
AddPrefix boolean is enabled) and inputs A and B as:

3. Enable remote config
Enable remote config inside the graph editor: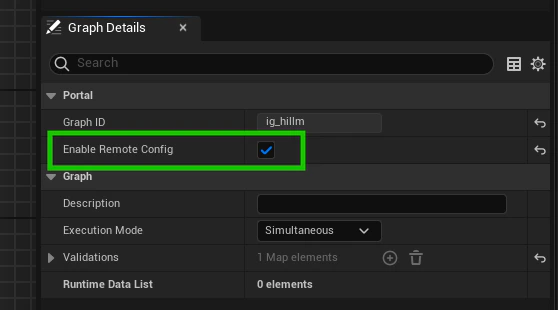
- AddPrefix is false:
{Request text} --- {LLM response} - AddPrefix is true:
PREFIX --- {Request text} --- {LLM response}
Ministral-8b-Latest with AddPrefix = false:
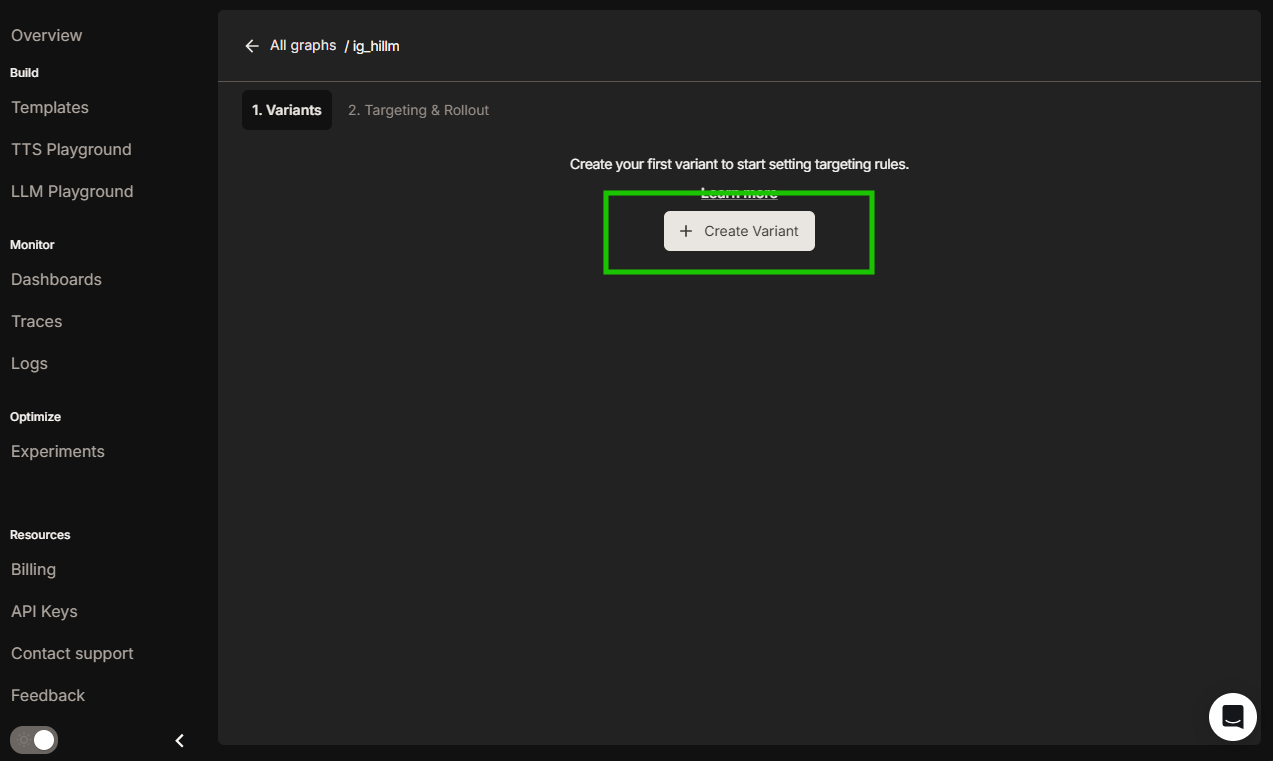
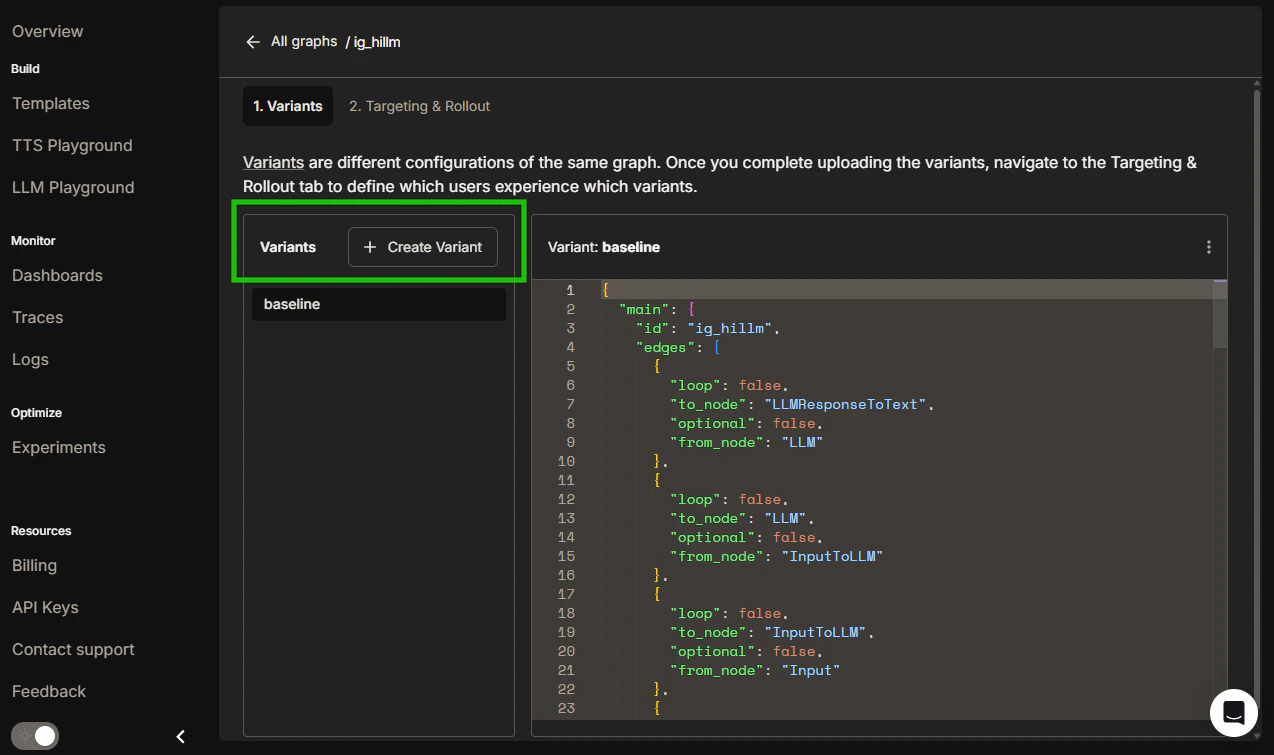
Step 2 - Register variants
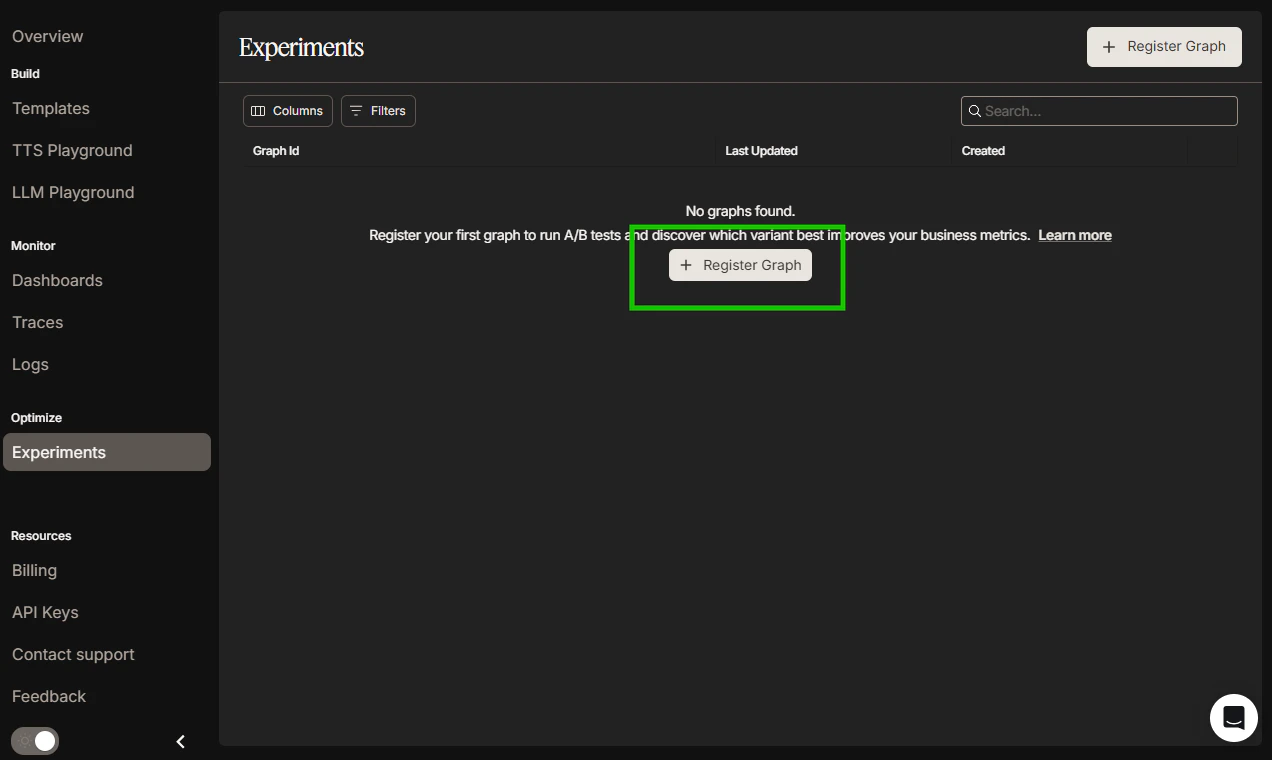
Registering a variant tells Portal which configuration can participate in Experiments. Start with the baseline, then add variants.1. Register the baseline variant
-
Register Graph:
-
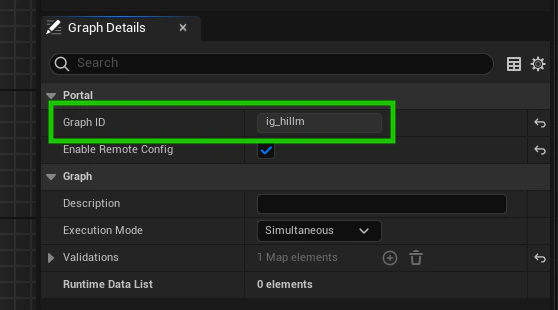
Copy the Graph ID from the Graph Editor:
-
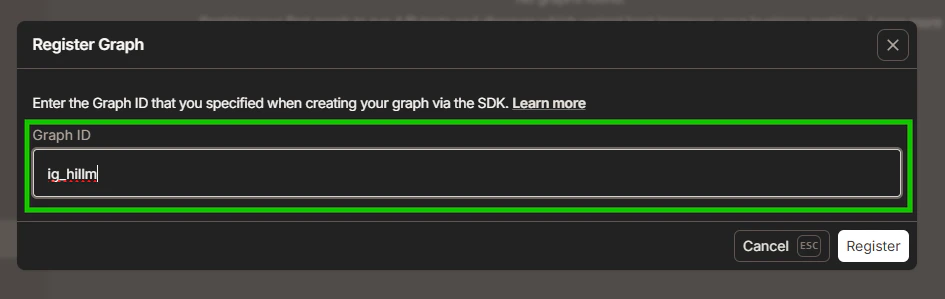
Enter or paste the Graph ID to the Portal:
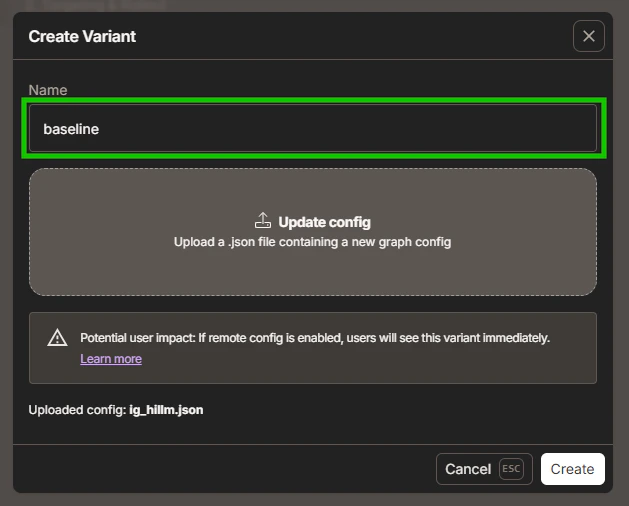
2. Create baseline variant
-
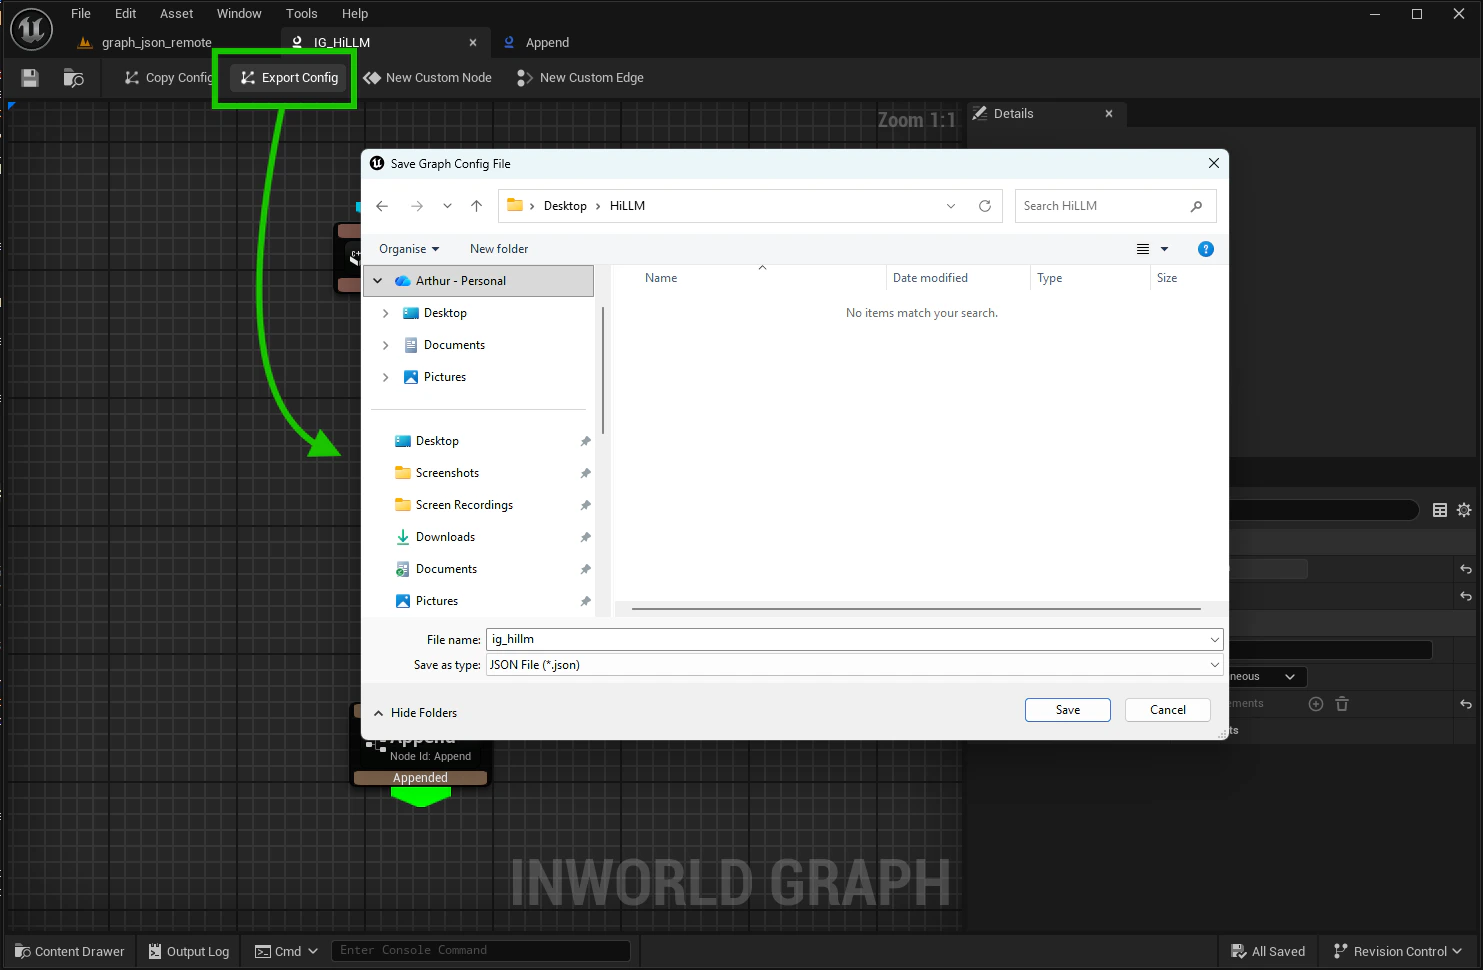
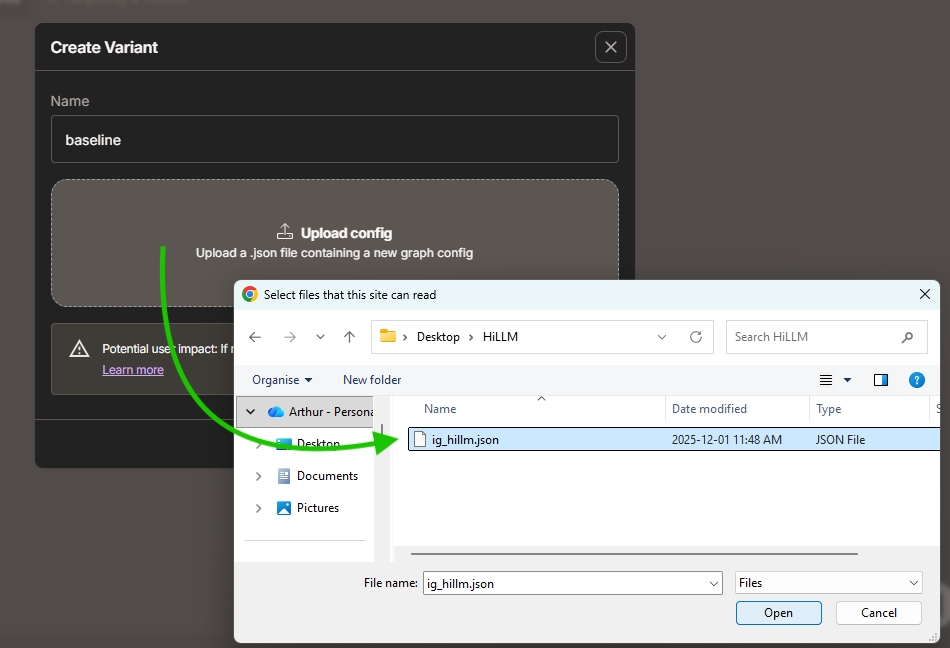
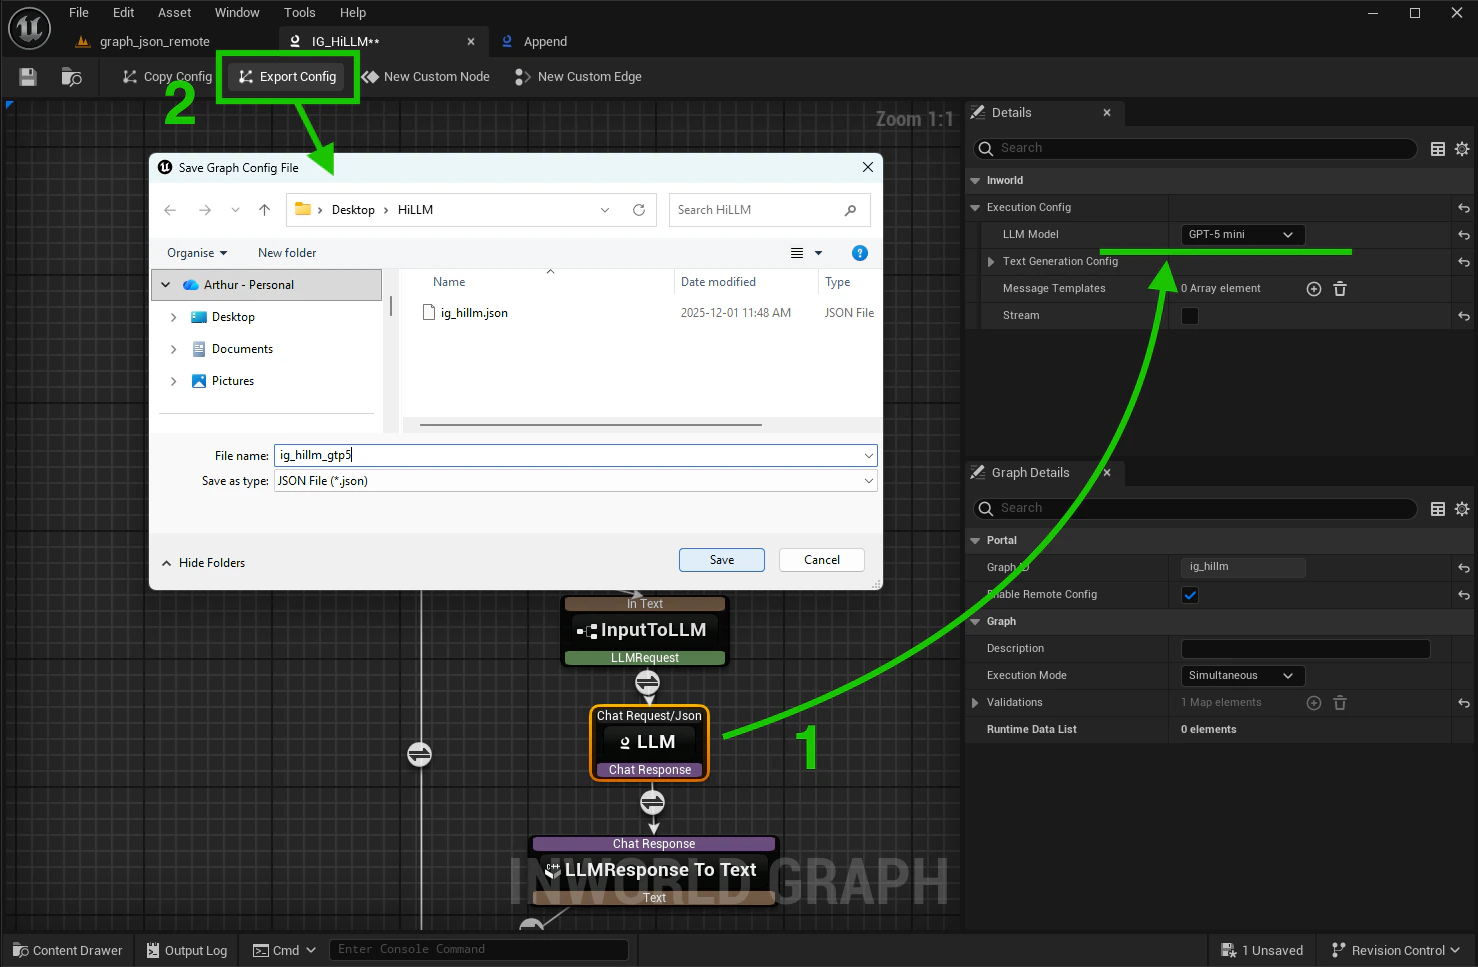
Export baseline JSON config from the Graph Editor:
-
Click on created Graph then Create Variant in the Portal:
-
Upload baseline JSON config to the Portal:
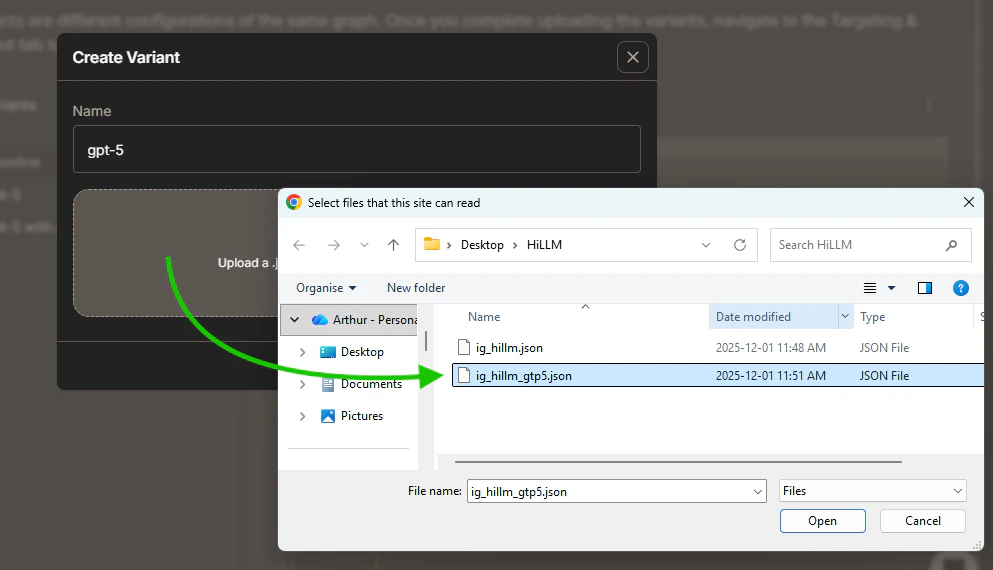
3. Create GPT-5 variant
-
Export GPT-5 config from the Graph Editor:
-
Create and upload GPT-5 variant to the Portal:
4. Create GPT-5 with AddPrefix variant
-
Export GPT-5 config from the Graph Editor:
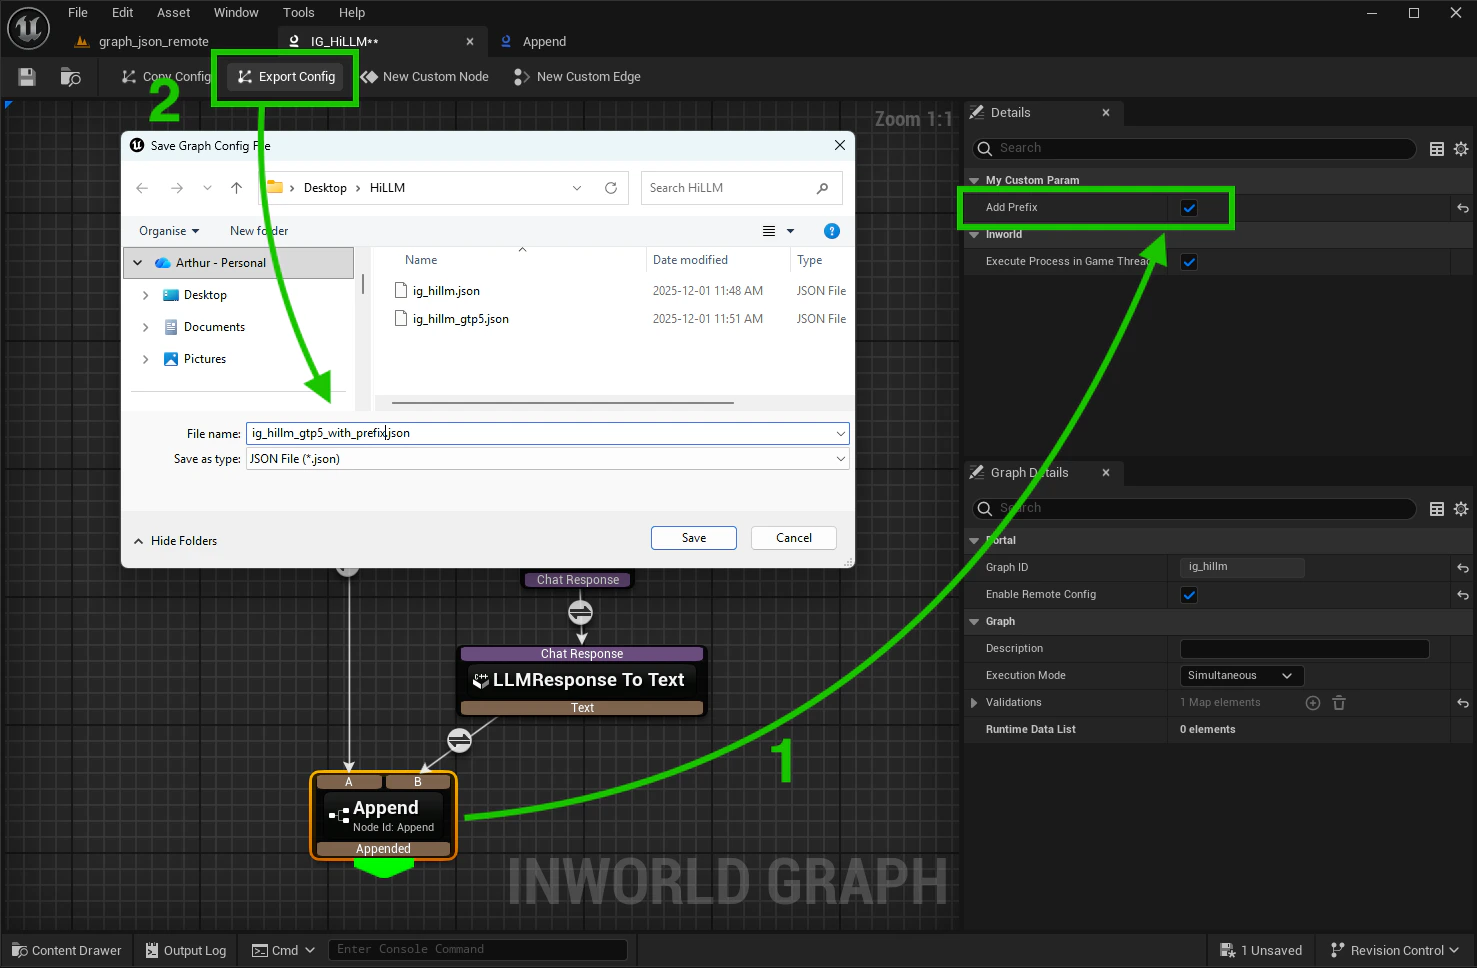
- Create and upload GPT-5 with prefix variant to the Portal
Step 3 - Start an experiment
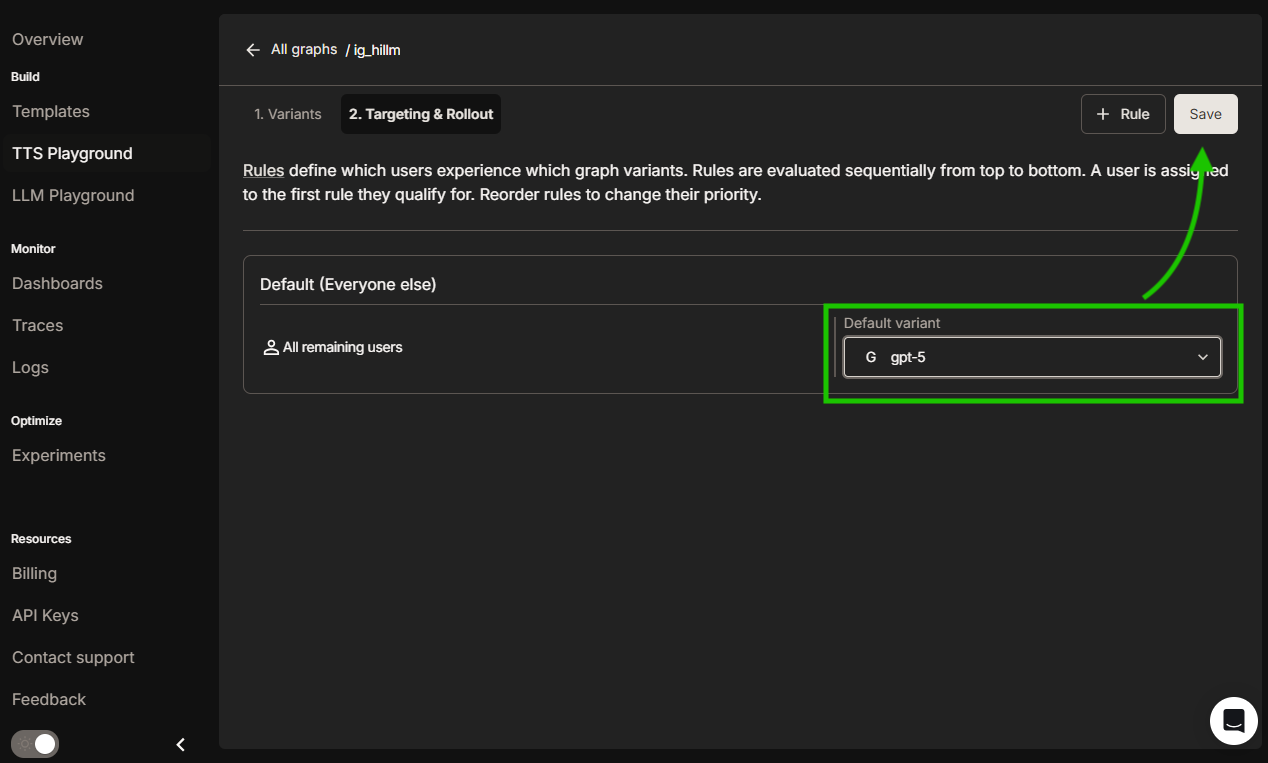
Open the Targeting & Rollout tab and set default variant: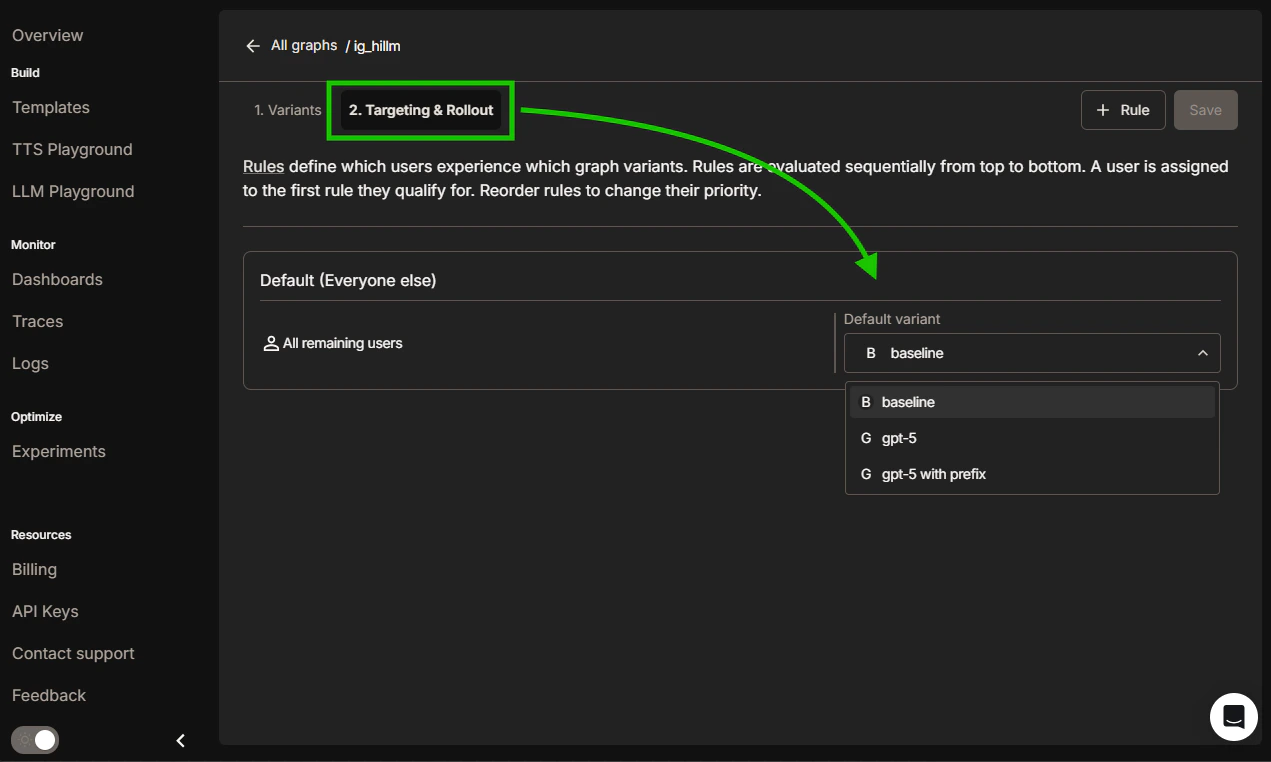
- All currently running graph instances (on their next execution)
- All newly compiled graphs
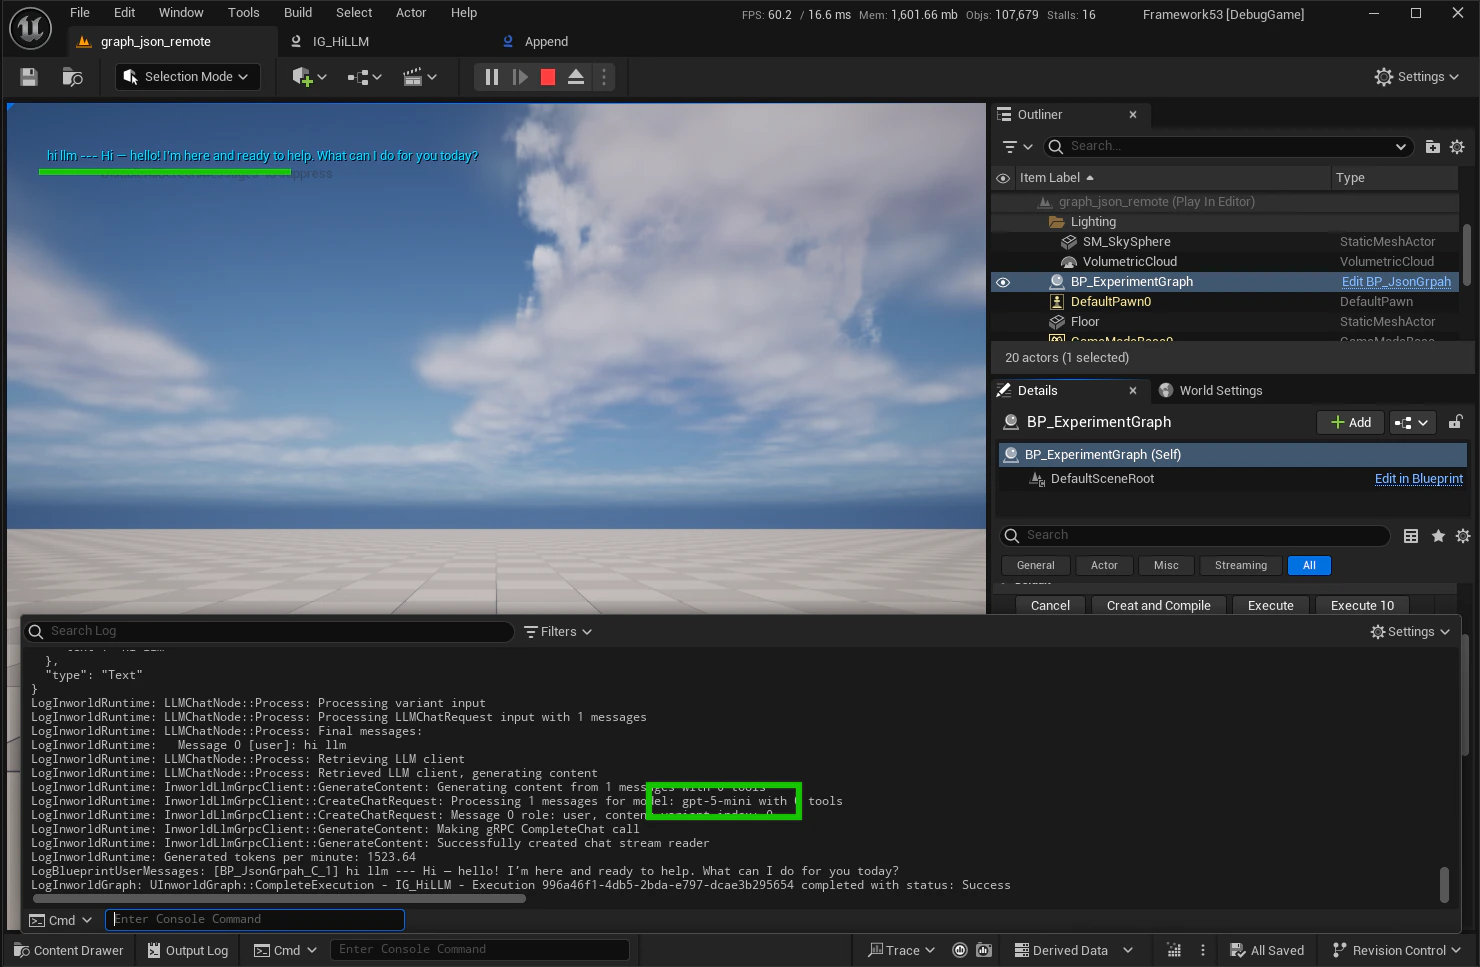
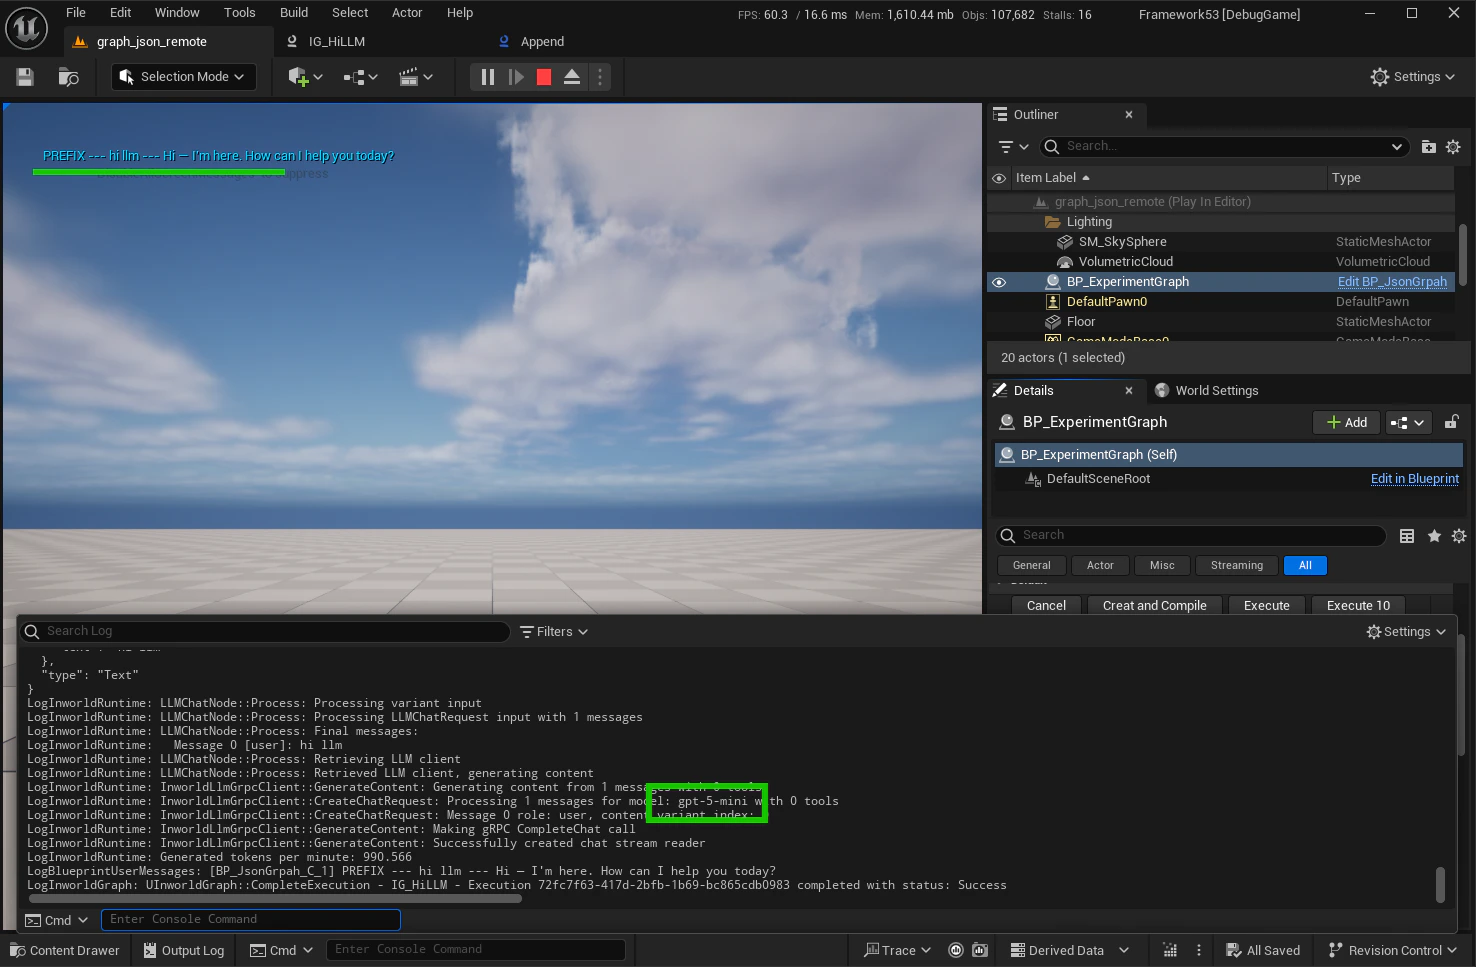
Example results
Baseline execution: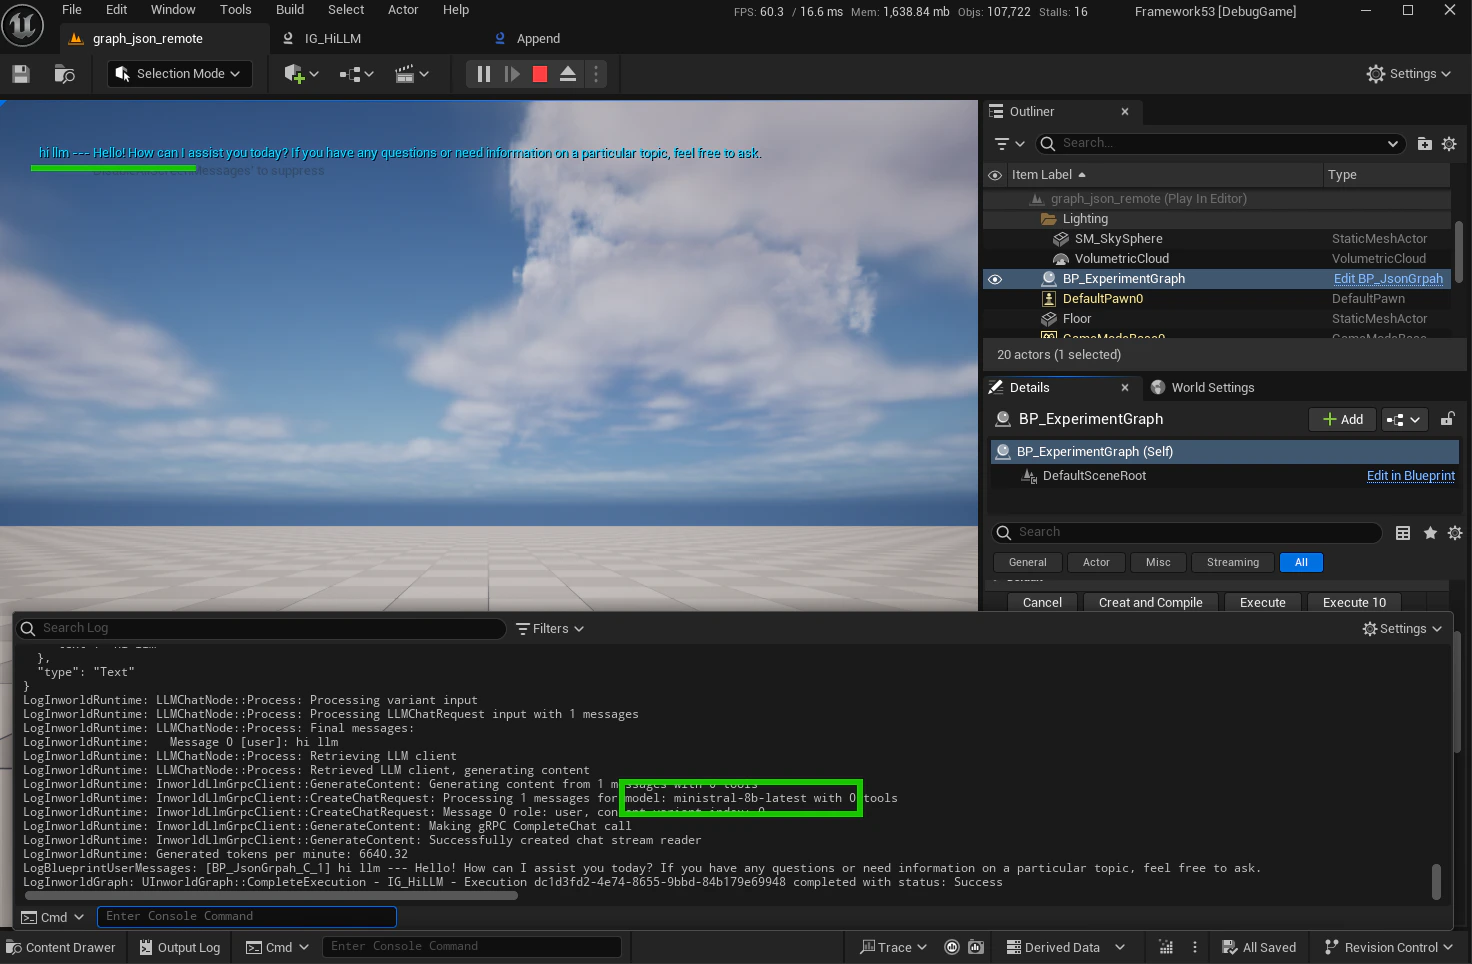
Step 4 - Monitor & roll out
Monitor your experiment results and deploy the winner:- Watch metrics: Monitor dashboards, traces, and logs while the experiment runs
- Gradual rollout: Increase the winning variant’s allocation gradually (50/50 → 70/30 → 90/10), then set it to 100% and retire old rules
- Rollback: Roll back or tweak allocations if latency, errors, or business KPIs regress
How Experiments work
When a request hits your graph, the runtime decides whether to use the local configuration or a remote variant from Experiments:- Remote config must be enabled
- The graph ID must be registered in Experiments and have at least one active rule that returns a variant
- Local cache check: If the compiled variant for this user is cached, it executes immediately; otherwise Experiments is queried
- Variant fetch: Experiments evaluates your targeting rules, returns the selected variant, and falls back to the local configuration if no rule applies or the fetch fails
- Compile & cache: The runtime compiles the variant payload, caches it, and executes the graph with the new configuration
Troubleshooting
Failed to resolve struct flag
Error:LogInworldRuntime: Failed to resolve struct flag: ....... with targeting key: ....... with error: Flag not found
If you see this error in the output log, it usually means one of the following:
- Remote Config is enabled, but the graph was not registered in Portal
- The Graph ID registered in Portal does not match the Graph ID in Unreal Engine
Targeting changes not appearing
Issue: I changed targeting and don’t see changes on the next executions Sometimes targeting updates take time to propagate. Wait a few moments and retry—the new variant will be applied on the next graph execution once the change is fully propagated.Supported via Experiments
Applied on next executions (no code redeploy)
- Switch LLM/STT/TTS models or providers
- Adjust node configuration (temperature, token limits, prompts)
- Reorder/add/remove nodes while preserving the same inputs/outputs
- Update processing logic (edges, preprocessing steps, data flow)
- Modify custom node parameters
- Modify custom edge conditions parameters
Requires a code deployment
- Deploying new custom nodes/edges
- Changing processing functions for custom nodes/edges
- Changing the graph’s input/output interface