- LLM - for extracting content from player input
- Having the LLM respond in JSON format and then de-serializing that JSON into game structures
Run the Template
- Open the settings menu in the Content Browser within Unreal
- Enable the option for “Show Plugin Content”
- In the Content Browser, navigate to
/Plugins/InworldCommand/Levels - Double-click on the CommandLevel map
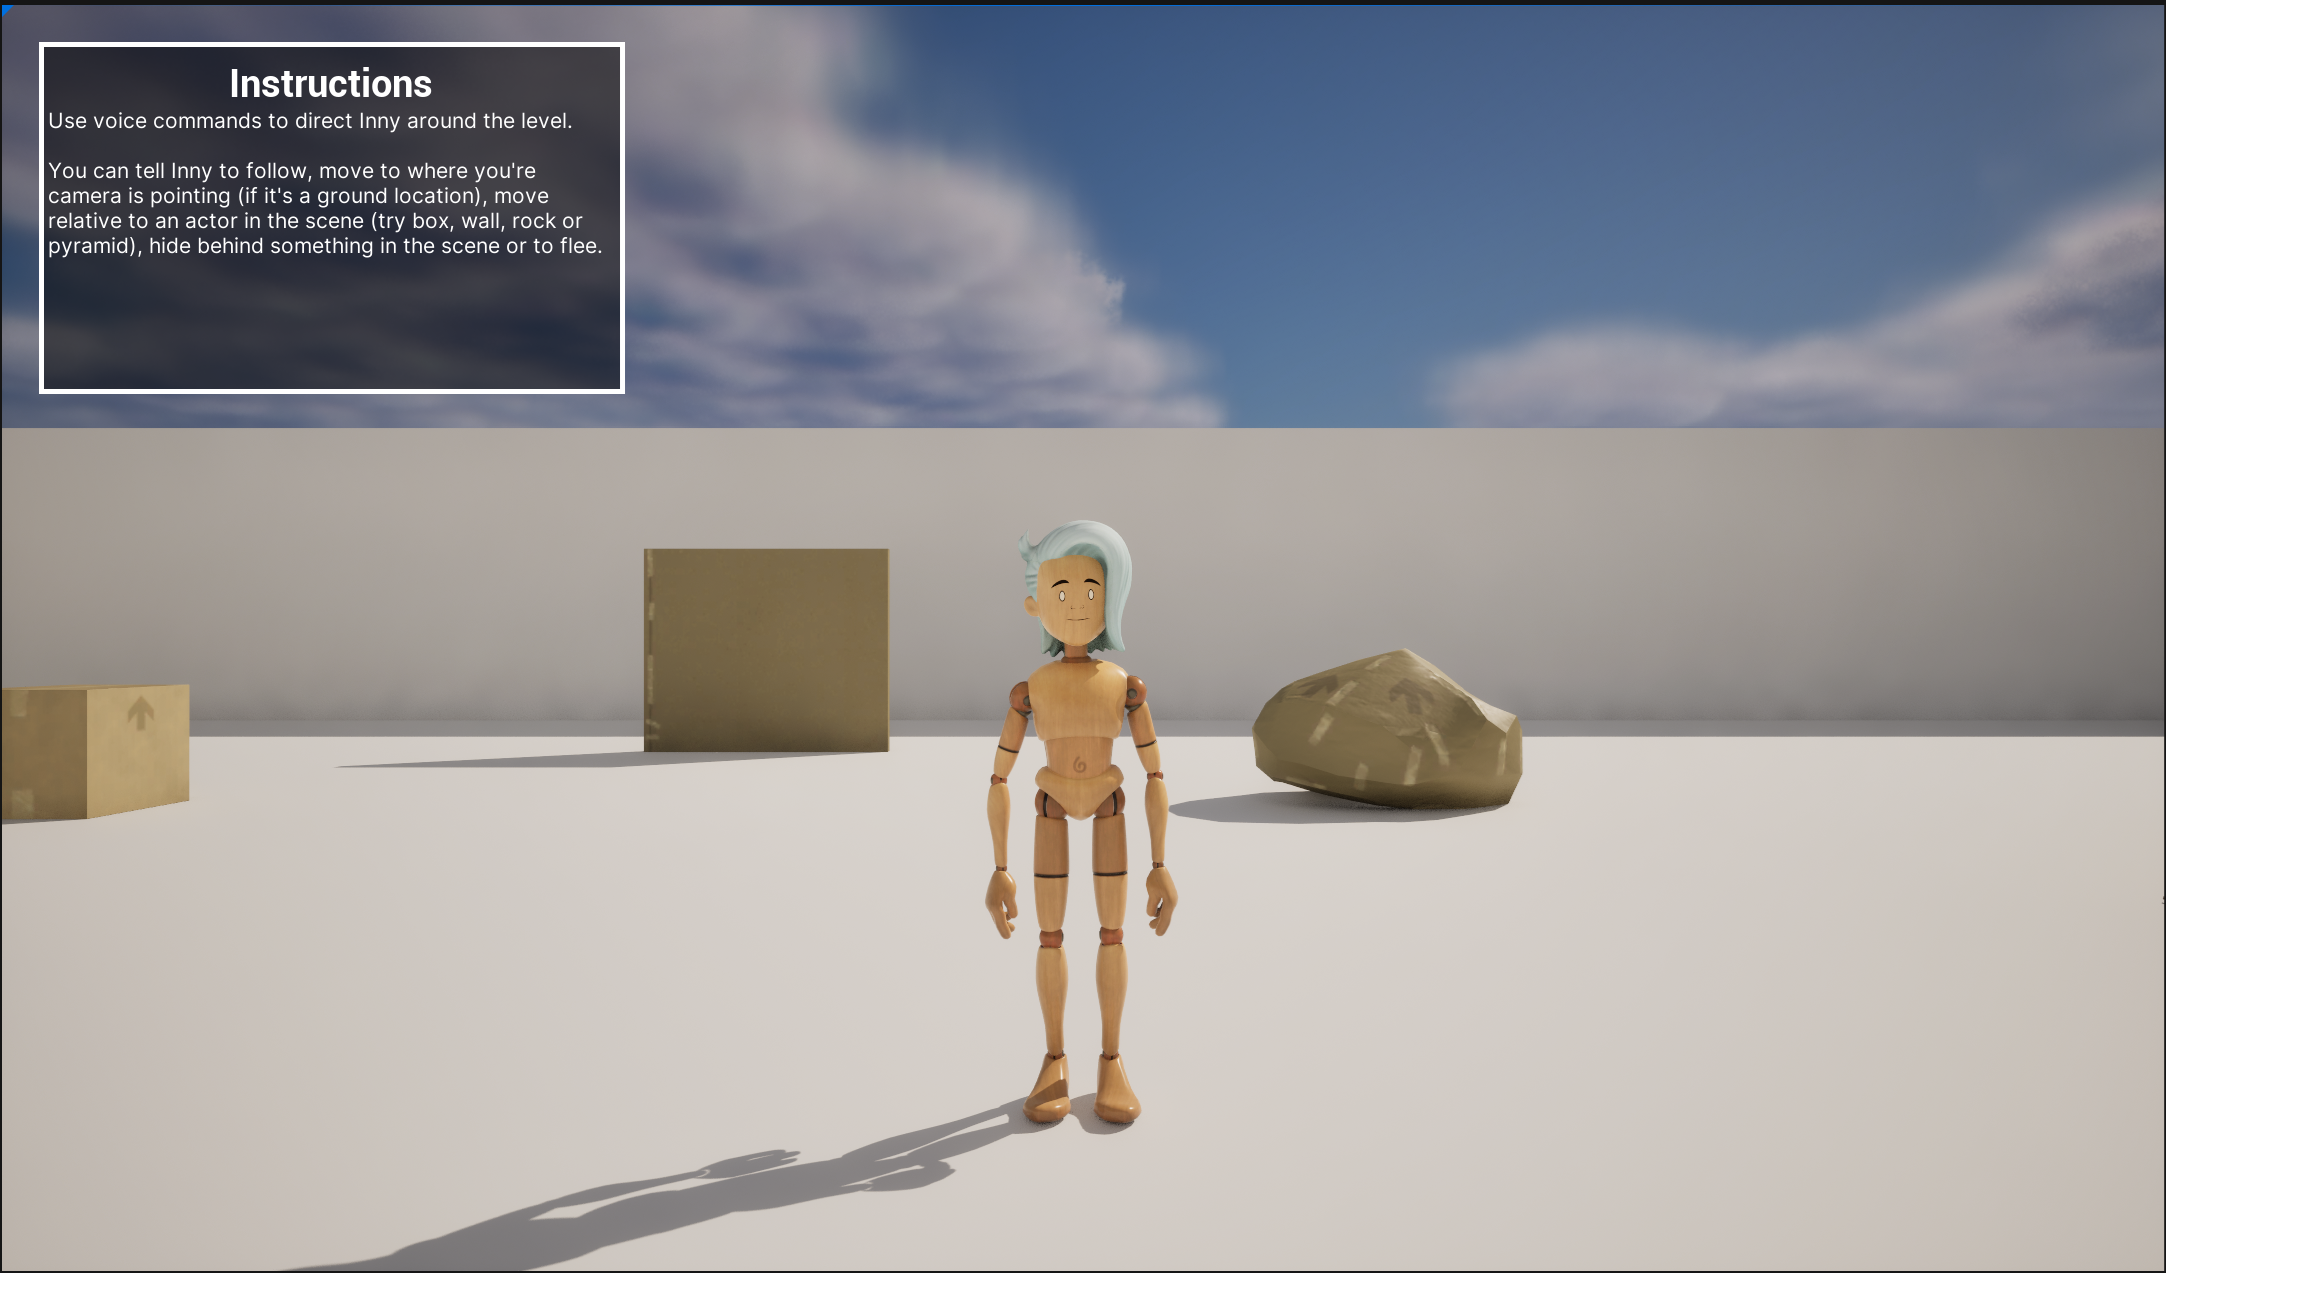
- Click the Play-in-Editor button (alt+p) to launch your level
- Use your microphone to direct the AI agent around the map
Setting up your own game
Now, let’s say you want to set up content extraction in your own game.Player setup
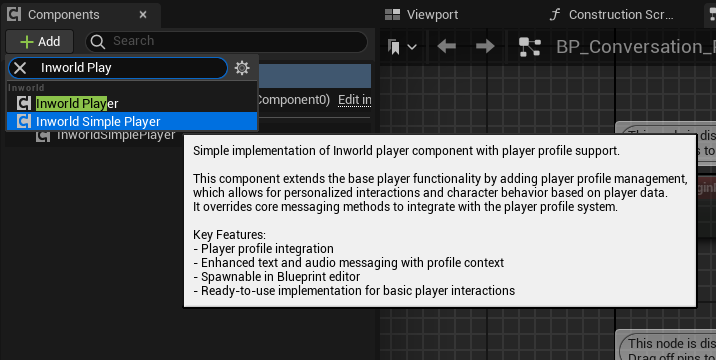
Let’s start with the player.- Add the Inworld Simple Player component to an Actor or other blueprint in your level. In this template we attached the Inworld Simple Player component to a custom Player Controller.
- Setup the Audio Capture config:
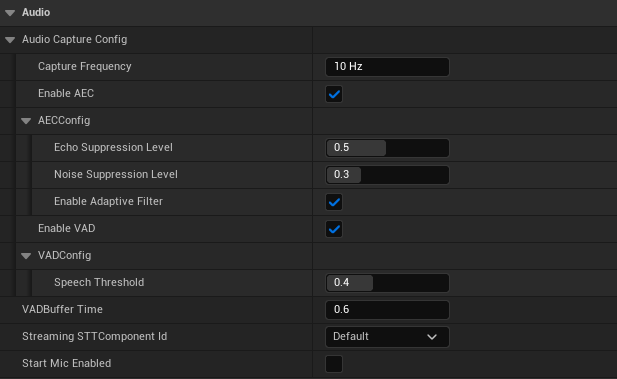
- Enable AEC - Enable Acoustic Echo Cancellation (AEC). This helps reduce game audio from being interpreted as player speech when captured by the microphone.
- AECId - Ids the AEC primitive creation configuration (there is currently no creation config settings, just leave as
Default) - AECConfig:
- Echo Suppression Level - AEC processing intensity (0.0-1.0, higher values provide stronger echo cancellation)
- Noise Suppression Level - Noise suppression intensity (0.0-1.0, higher values provide stronger noise reduction)
- Enabled Adaptive Filter - Enable adaptive filtering for better echo cancellation
- Enable VAD - Enable Voice Audio Detection (VAD). This is useful for determining when the player is speaking for sending audio data.
- VADId - Ids the VAD primitive creation configuration (there is currently no creation config settings, just leave as
Default) - VADConfig:
- Speech Threshold - Sensitivity threshold for detecting speech. This is a
floatvalue where higher thresholds make the detection more selective (fewer false positives), and lower thresholds make it more sensitive (detecting quieter speech). Valid range: 0.0 - 1.0 (default = 0.4)
- Speech Threshold - Sensitivity threshold for detecting speech. This is a
- VADBuffer Time - The amount of silence required before it is determined that the player has stopped speaking.
- Start Mic Enabled - Whether to start the game with the microphone enabled.
Target setup
Now, let’s set up the target actor.- Start by creating a blueprint actor that receive player input and extract content from it
-
Create the following variables:
- Graph Asset (UInworldGraphAsset)
- Make instance editable and (optionally) blueprint-read only
- After compiling, set the initial value of this asset to be “IG_CommandTranslator” (the graph asset provided with the InworldCommand plugin)
- Later you can change this to a custom graph if desired
- Graph Instance (UInworldGraph)
- Graph Asset (UInworldGraphAsset)
-
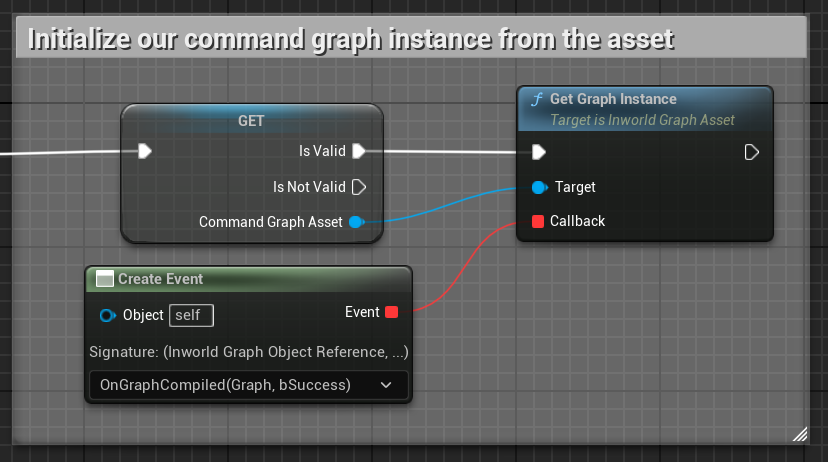
In the begin play function of your actor, setup the graph by calling “GetGraphInstance” on the Graph Asset variable:
-
Drag from the event input and “Create Event.” Create a new function, rename it to “OnGraphCompiled” and take the “Graph” input and use it to set the “Graph Instance” variable:
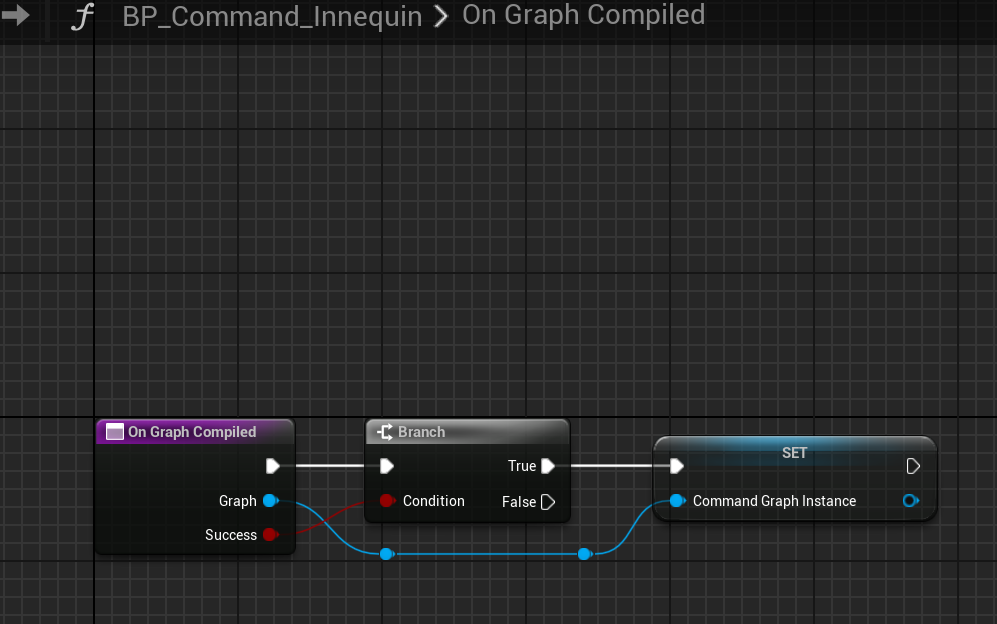
-
You will now be able to execute the graph whenever you receive input from the player. To pipeline user input directly to graph execution, add IInworldConversationTarget interface to your actor (click on class defaults and add the interface near the bottom):
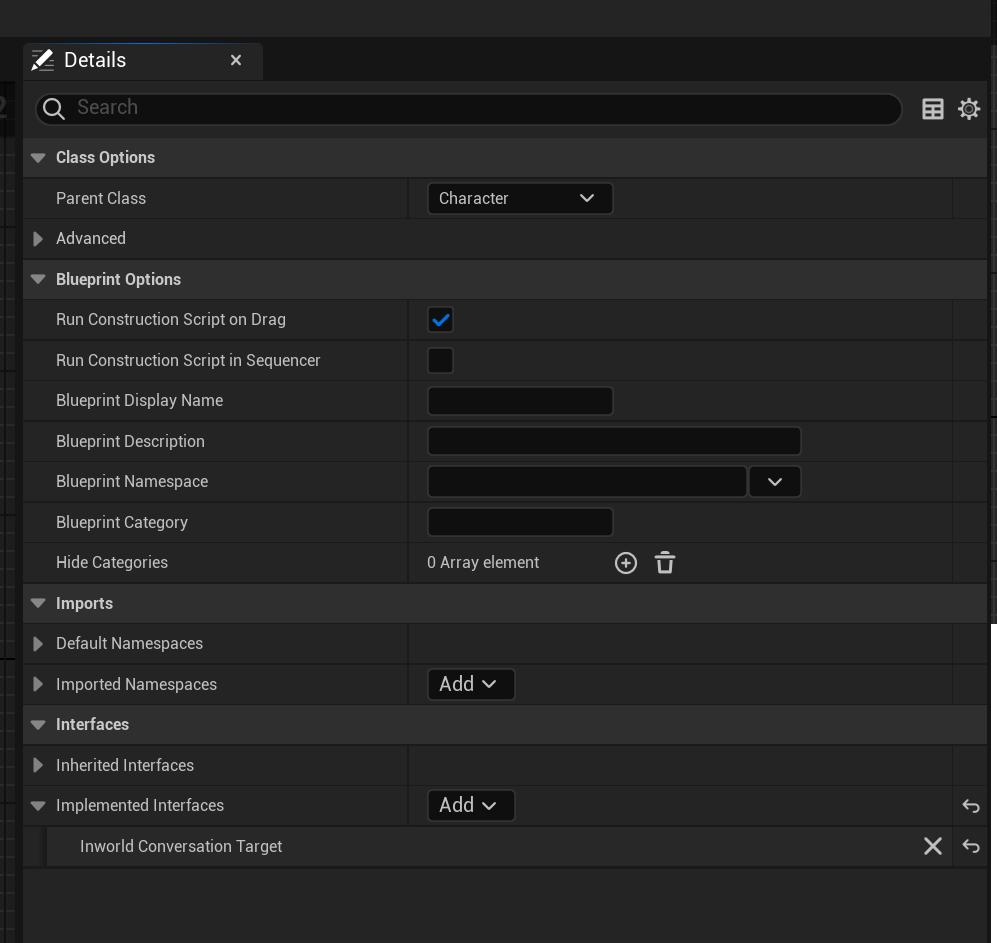
-
Once the interface has been added, double click on “Send Player Message” in the “Interfaces” section and add the following code:
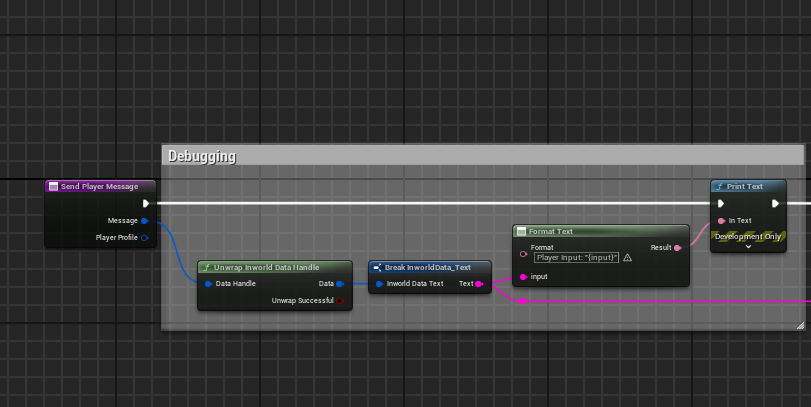
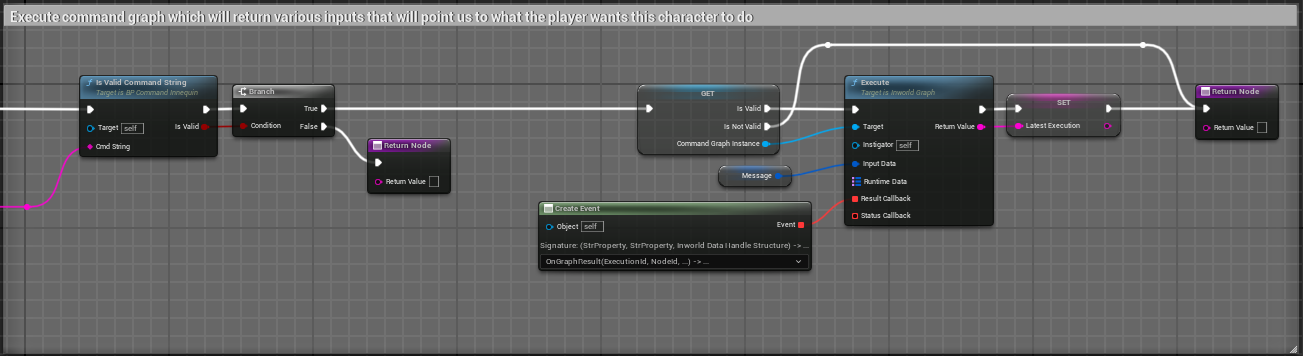
-
Drag from the event input of the “Execute Graph” function and “Create Event.” Rename your input “OnGraphResult.” If the graph executed successfully the “Data” input to this function will contain your JSON formatted text. De-serializing this JSON text must be done in C++. Here is the example for the command plugin:\

-
Finally, go back to your player controller blueprint and set the player component’s conversation target to your AI actor using the following function:
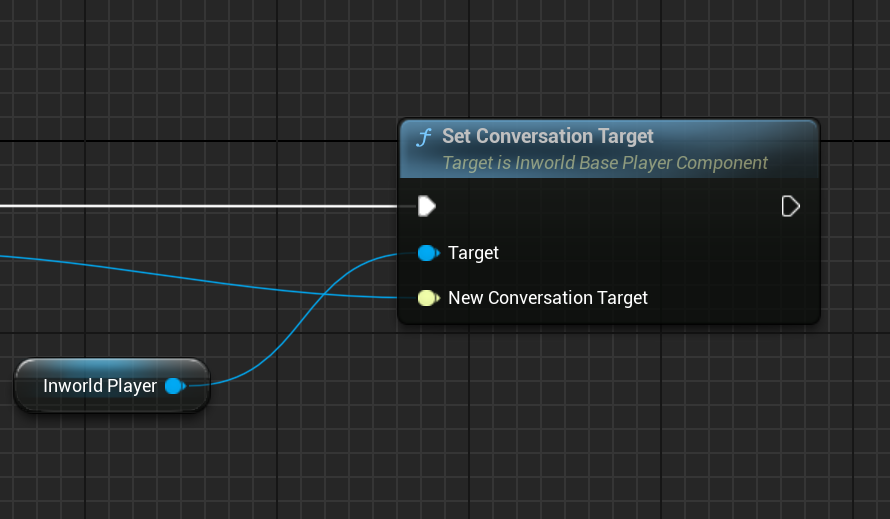
With the conversation target set, when the player speaks, the input will be piped directly to the conversation target, which in this case is the actor we setup earlier
Understanding the Command Translator Graph
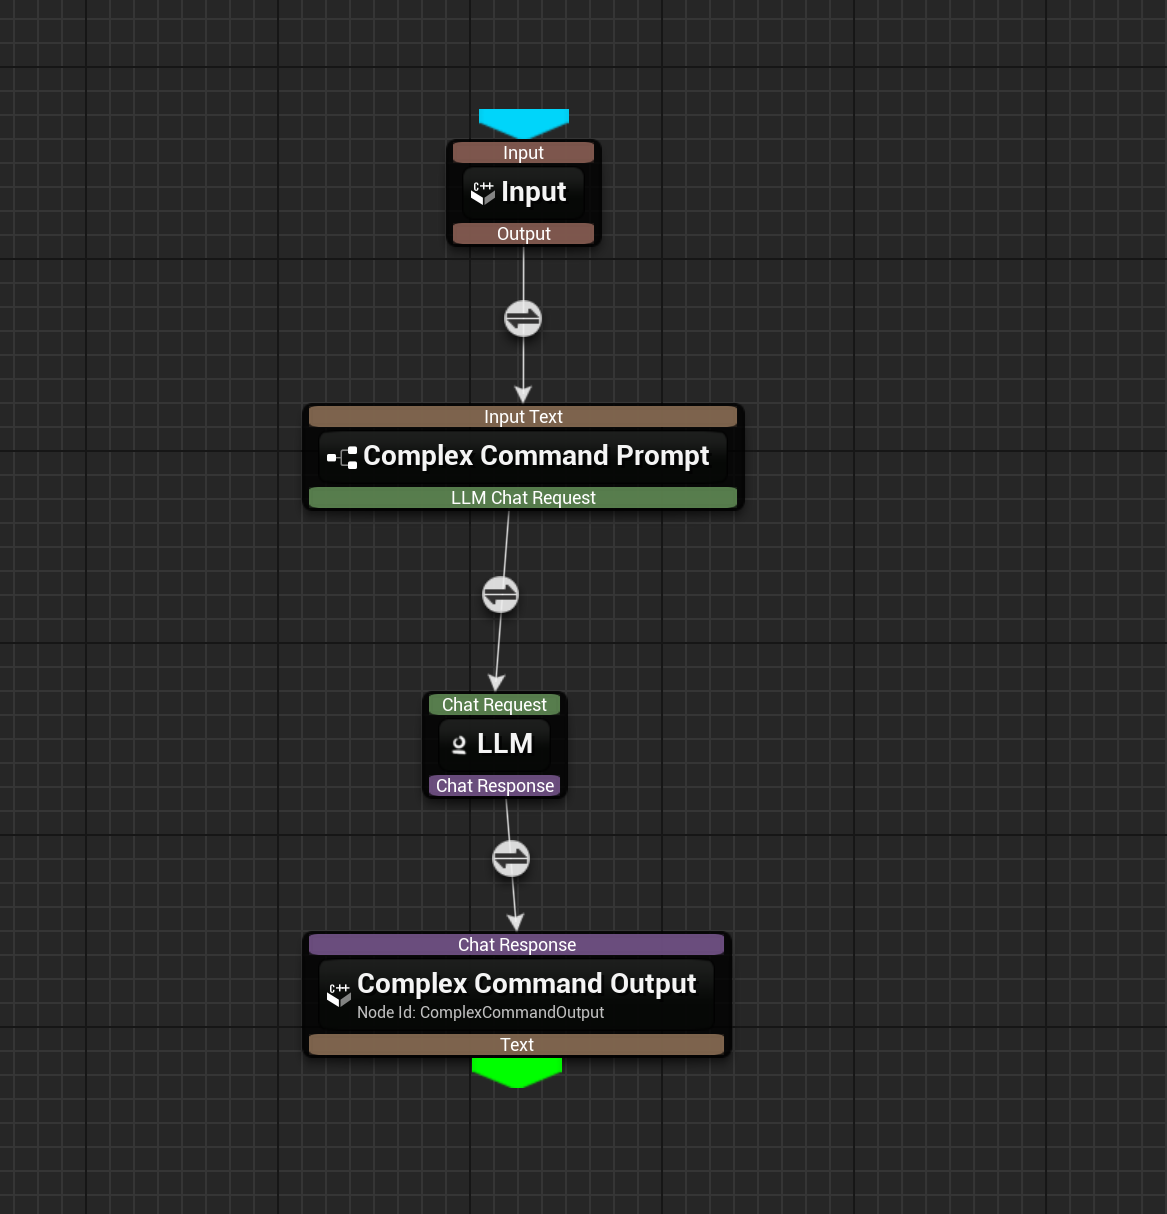
Now let’s walk through how the graph (IG_CommandTranslator) that is powering the content extraction works. Double click on the graph asset (its in /InworldCommandContent/Data). You should see the following:
-
The node at the top titled “Input,” is the start node (the blue arrow denotes starting nodes). It is a “Routing” node, which has no logic, its used purely to move data and organize logic in the graph structure
- The expected input to this graph is text data, either directly from user input or as output from speech-to-text (STT)
-
The next node is the “Complex Command Prompt” node. This is a custom node that creates the prompt that we are going to send to the large-language model (LLM) in the next step. Double click on this node to see how it works:
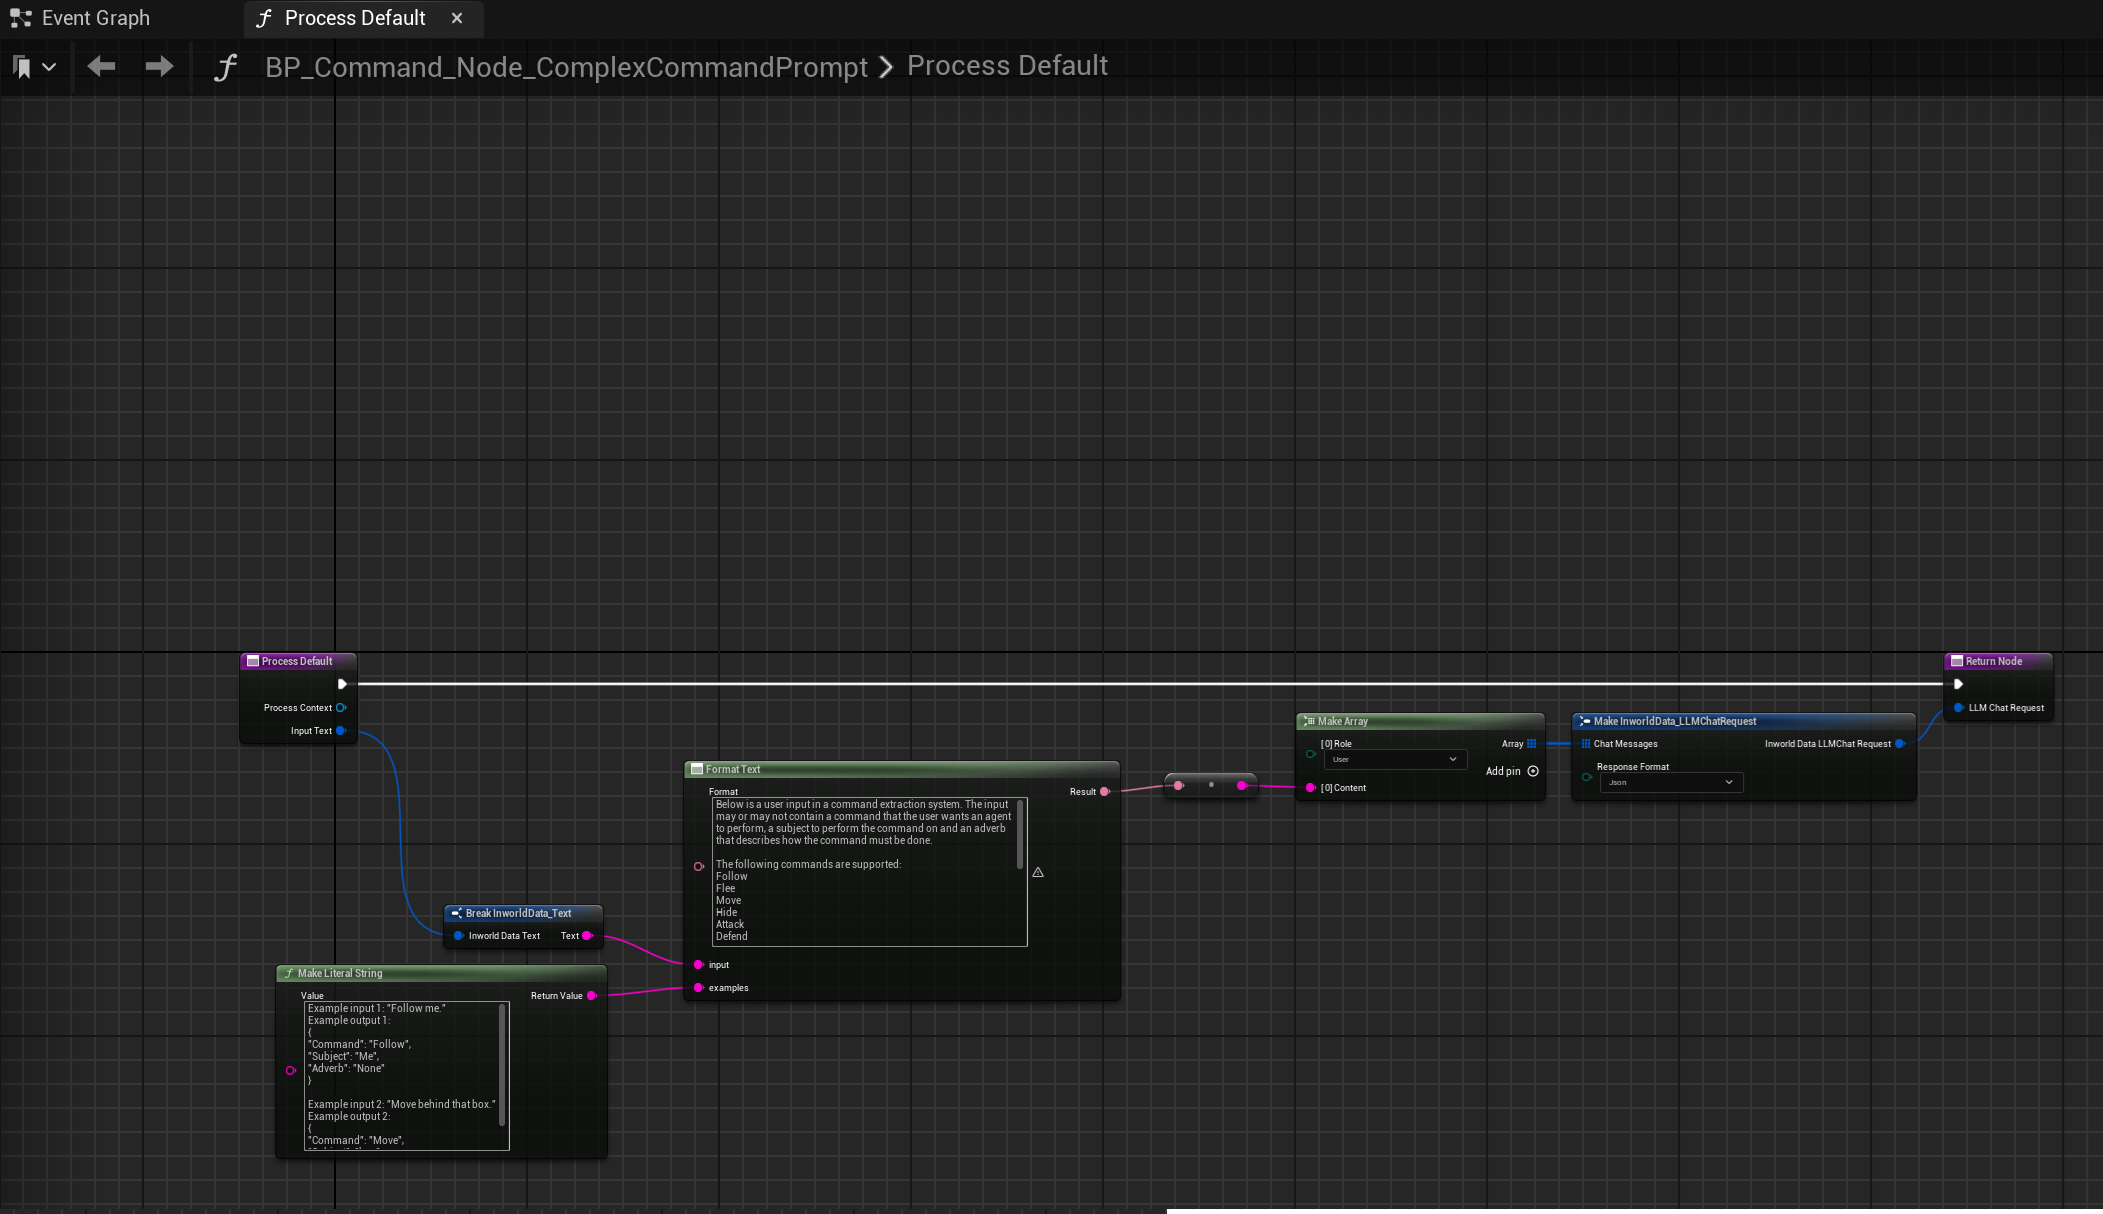
- The custom node takes the user input and combines it with instructions to the LLM to generate a JSON with the data we want extracted
-
Back to the graph, the next node we see if the LLM node. This node will send our prompt to an LLM and send the response to the next node in the graph. We have changed two settings for this node, as seen in the panel on the right side:
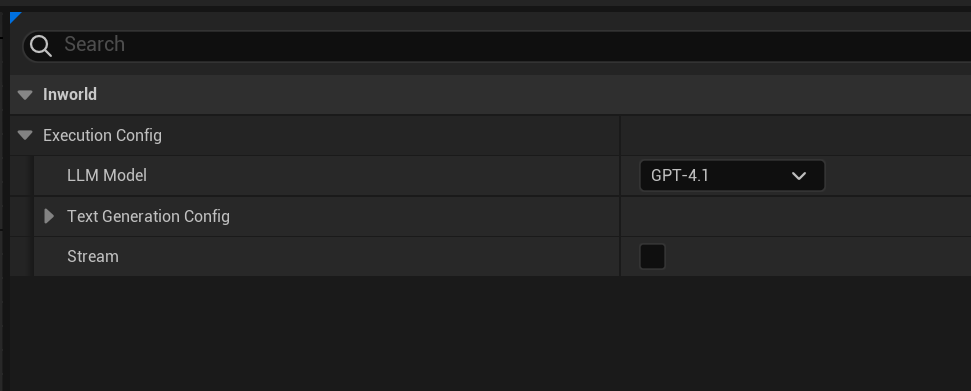
- Generally, for content extraction we want to use a smarter model, in order to guarantee JSON format correctness and accurate reading of user input. In this case we opted for GPT 4.1, feel free to experiment with other options
- We set “Stream” to false since we want the entire output in one go
-
The final node we have, named “Complex Command Output” is an LLM-to-Text conversion node. It takes the output structure from the LLM and returns only the text
- This node is marked with the green arrow, designating it as an “End Node”