This template creates AI-generated 4-panel comics using the Inworld Runtime and MiniMax Image Generation API. Key concepts demonstrated:
  • Custom nodes extending the CustomNode class for specialized processing
  • LLM-powered story generation
  • External API integration (MiniMax) for image generation
  • Parallel processing for efficiency
  • Error handling and retry logic

Watch the Demo

Architecture
  • Backend: Inworld Runtime + Express.js + Minimax API
  • Frontend: Static HTML + JavaScript
  • Communication: HTTP

Run the Template

  1. Clone the comic generator GitHub repo.
  2. Set up your API keys by creating a .env file in the project’s root directory with your required API keys:
    .env
    # Required, Inworld Runtime Base64 API key
    INWORLD_API_KEY=<your_inworld_api_key_here>
    
    # Required, MiniMax API key for image generation
    MINIMAX_API_KEY=<your_minimax_api_key_here>
    
  3. Install dependencies and start the server:
    yarn && yarn start
    
    The server will start on port 3003 (or the port specified in your PORT environment variable).
  4. Open your browser and navigate to http://localhost:3003 to access the comic generation interface.
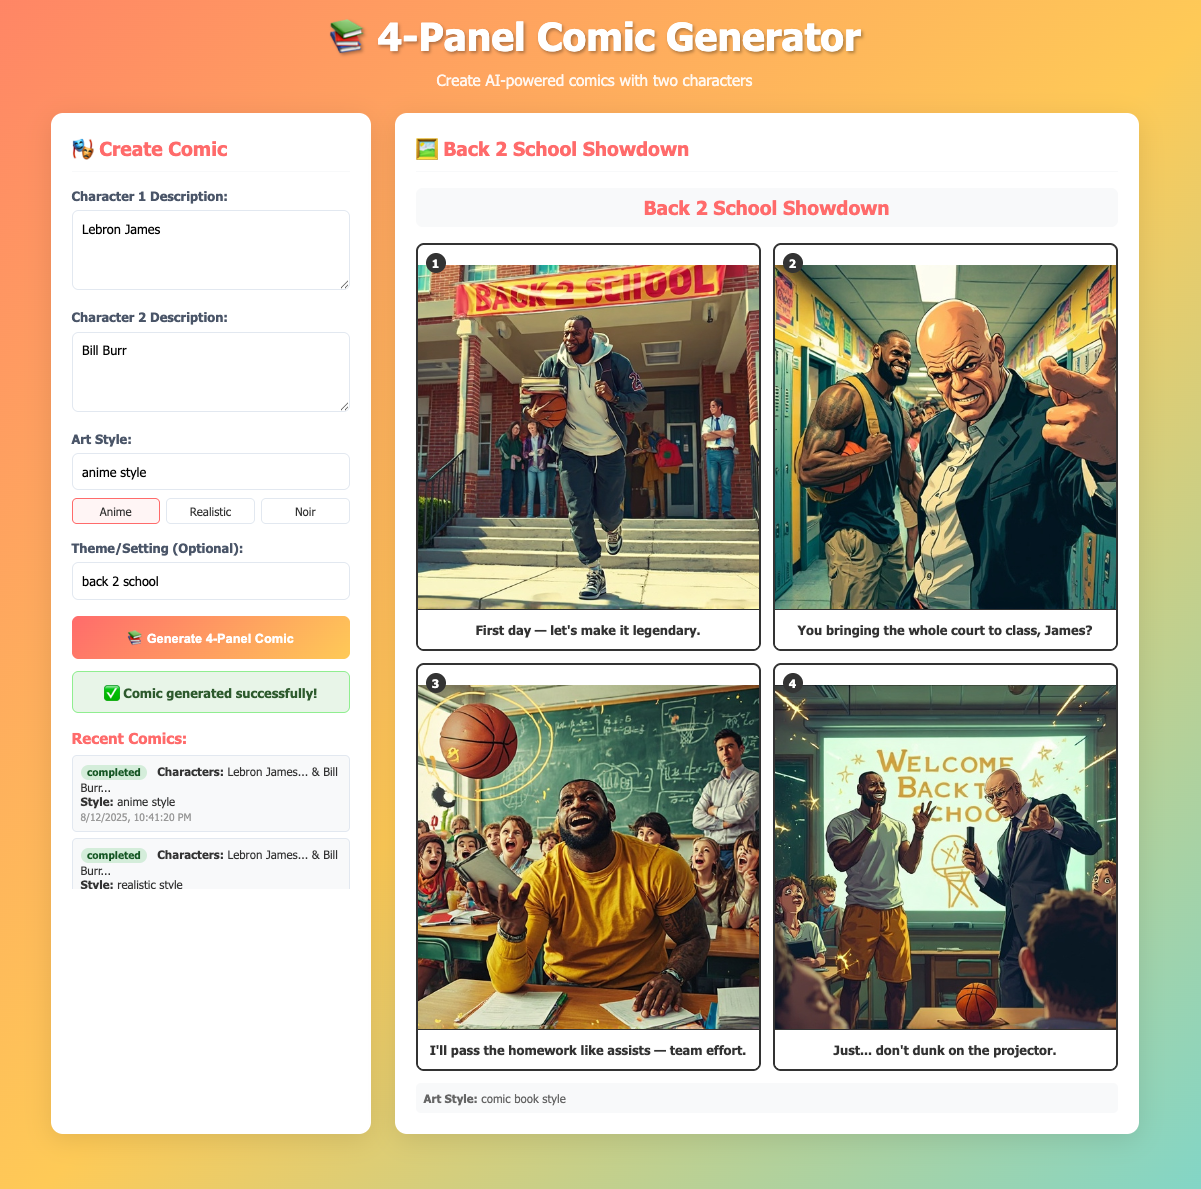
  5. Create a comic by filling in the form:
    • Character 1 Description: e.g., “A brave knight with shiny armor”
    • Character 2 Description: e.g., “A wise old wizard with a long beard”
    • Art Style: e.g., “anime manga style” or “cartoon style”
    • Theme (optional): e.g., “medieval adventure”
  6. Click “Generate Comic” and wait for the processing to complete. You can check the status or view recent comics through the interface.
  7. Check out your captured traces in Portal!

Understanding the Template

The core functionality of the comic generator is contained in comic_server.ts, which orchestrates a graph-based processing pipeline using custom nodes and built-in Inworld Runtime components. The template creates a processing pipeline that transforms user input through multiple AI processing stages to generate complete 4-panel comics.

1) Custom Node Implementation

The template defines custom nodes by extending the CustomNode class for specialized comic generation operations:
comic_story_node.ts
import { CustomNode, ProcessContext } from '@inworld/runtime/graph';
import { GraphTypes } from '@inworld/runtime/common';

// Custom node for generating story prompts
export class ComicStoryGeneratorNode extends CustomNode {
  process(context: ProcessContext, input: ComicStoryInput): GraphTypes.LLMChatRequest {
    const prompt = `You are a comic book writer. Create a 4-panel comic story with the following characters and specifications:
    CHARACTER 1: ${input.character1Description}
    CHARACTER 2: ${input.character2Description}
    ART STYLE: ${input.artStyle}
    ${input.theme ? `THEME/SETTING: ${input.theme}` : ''}
    Create exactly 4 panels for a short comic strip...`;
    
    return new GraphTypes.LLMChatRequest({
      messages: [{ role: 'user', content: prompt }]
    });
  }
}

// Custom node for parsing LLM responses
class ComicResponseParserNode extends CustomNode {
  process(context: ProcessContext, input: GraphTypes.Content) {
    return parseComicStoryResponse(input.content);
  }
}

// Custom node for image generation
export class ComicImageGeneratorNode extends CustomNode {
  async process(context: ProcessContext, input: ComicStoryOutput): Promise<ComicImageOutput> {
    // Generate images for all 4 panels using MiniMax API
    // ... image generation logic
  }
}

2) Node Creation

After defining custom node classes, the graph creates instances of both custom and built-in nodes:
comic_server.ts
// Create custom node instances
const storyGeneratorNode = new ComicStoryGeneratorNode();
const responseParserNode = new ComicResponseParserNode();
const imageGeneratorNode = new ComicImageGeneratorNode();

// Create built-in LLM node
const llmChatNode = new RemoteLLMChatNode({
  provider: 'openai',
  modelName: 'gpt-5-mini',
  stream: false,
});

3) Core Graph Construction

With all nodes created, the comic generation pipeline is assembled using GraphBuilder by connecting each processing stage:
comic_server.ts
const graphBuilder = new GraphBuilder({ 
  id: 'comic_generator',
  apiKey: process.env.INWORLD_API_KEY!
});

// Add all nodes to the graph
graphBuilder
  .addNode(storyGeneratorNode)
  .addNode(llmChatNode)
  .addNode(responseParserNode)
  .addNode(imageGeneratorNode);

// Connect the nodes to create the processing pipeline
graphBuilder
  .addEdge(storyGeneratorNode, llmChatNode)
  .addEdge(llmChatNode, responseParserNode)
  .addEdge(responseParserNode, imageGeneratorNode)
  .setStartNode(storyGeneratorNode)
  .setEndNode(imageGeneratorNode);

const comicGeneratorGraph = graphBuilder.build();
This creates the complete flow: User Input → Story Generation → LLM Processing → Response Parsing → Image Generation → Final Comic

4) Graph Execution

Once the graph is built, the server uses it to process comic generation requests asynchronously. When a user submits a comic request through the REST API, the following execution flow begins:
comic_server.ts
async function generateComic(request: ComicRequest) {
  const input: ComicStoryInput = {
    character1Description: request.character1Description,
    character2Description: request.character2Description,
    artStyle: request.artStyle,
    theme: request.theme,
  };

  // Start graph execution
  const executionId = uuidv4();
  const outputStream = await comicGeneratorGraph!.start(input, executionId);
  
  // Process the output stream (see Response Handling)
  await processGraphOutput(outputStream, request);
  
  // Clean up resources
  comicGeneratorGraph!.closeExecution(outputStream);
}

5) Response Handling

As the graph processes through each stage, the application monitors the output stream and manages the comic generation lifecycle. This enables real-time status tracking and provides users with immediate feedback:
comic_server.ts
async function processGraphOutput(outputStream: any, request: ComicRequest) {
  // Iterate through graph execution results
  for await (const result of outputStream) {
    // Extract the final comic with generated images
    request.result = result.data as ComicImageOutput;
    request.status = 'completed';
    console.log(`✅ Comic generation completed for request ${request.id}`);
    break;
  }
}

// REST API endpoint for client polling
app.get('/api/comic-status/:requestId', (req, res) => {
  const request = requests[req.params.requestId];
  
  if (!request) {
    return res.status(404).json({ error: 'Request not found' });
  }

  // Return current status and results if available
  const response = {
    requestId: request.id,
    status: request.status,
    ...(request.status === 'completed' && { result: request.result })
  };

  return res.json(response);
});
This demonstrates the power of the Inworld Runtime’s graph architecture - you can create sophisticated AI processing pipelines by combining custom nodes with built-in components, handling complex workflows with proper resource management and error handling.